Showing posts with label tips for beginners. Show all posts

Tuesday, February 19, 2013

Halloween 2012: Homemade Vampire Princess Costume

I took some time away from the blog to get some real-world stuff done, most of it involved travelling to warmer climates. Haven't had time to sew much, but thought I'd jump back in where I left off-  Halloween!

My daughter wanted to be a "Vampire Princess" for Halloween which sounds ludicrous because it is, but she is 5 and I guess I should just be happy she wanted to be something only sort-of scary and that she didn't want to be a sexy kitty or something truly horrifying. 

A Homemade Vampire Princess Costume! 
This was her final fitting-- if you look close you'll see the trim isn't applied around the edge of the train yet and no black, bedazzled plastic crown.  The necklace was made with a black choker I had leftover from the '90s and a black brooch piece I picked up in Michael's tacky-jewelry making department.
I once again started with a commerical pattern and then totally ignored it.  The pattern in this case was Simplicity 2065, the "Tangled"-inspired Rapunzel costume.  I chose it because I thought it was more Medieval looking then the more poofy princessy dress patterns which kind of all look like overwrought 1950s ball gowns, really. 

 I got this on sale, so I don't feel quite so bad about barely using it.

For the bodice:  I immediately made some changes.  I omitted the ties and so adjusted the pattern pieces down an inch or so, making the center "stripe" a little thicker all the way down.  I also raised the neckline since all the Disney patterns seem to have a low neckline problem.  Plus, vampires don't wear a scoop-neck. I discovered over on PatternReview.com (beginner's tip:  pay the money and join, it is totally worth it!) that the neckline was also a bit wide so I narrowed that up too.  Instead of a zipper I put in Velcro.  My Aunt Gail helped me to figure out exactly how to place that-- I had it pinned in wrong for a couple of days and couldn't figure out how to fix it.  I also may or may not have lengthened the bodice-- I honestly can't remember, but it seems vaguely true.  I also omitted the stripes on the puff sleeves and instead of a sheer arm I went with a dark red shantung.  Insetting the puff sleeve was no problem at all.  Super easy.


Have I ever mentioned how difficult it is to tailor anything to a child?
 "Stop moving so I can poke you with pins!"

Please note these are the first full length sleeves I've made.  Yeah for me!  They turned out pretty well though I realize the straight arm proportions of a kid are much easier to fit than an adult. 


For the skirt portion:  The photo on the cover of the pattern is totally misleading.  Either that girl is wearing a crinoline or she has an enormous elephant ass.  Either way, if you follow the pattern your skirt will NOT be as full as the picture.  It's a simple drindle skirt (which I didn't even know what that was until I made this, but think Oktoberfest Barmaid instead of Cinderella) and is damn boring.   I didn't want poofy but I guess I didn't want flat either.  As soon as I cut it out and pieced it together I knew I was going to have to fancy-it-up somehow. 

The train (again without the trimmed edge). 
The curve was key; leaving it a rectangle would have looked stupid.

My solution was to convert the sheer overlay that split in the front into a full on Princess Diana-esque lace train.  Okay, maybe not that long, but chapel length at least.  This took math, figuring out where to place the lace, how many inches in to make it even at the sides and fashioning a curve (on my own) so it would puddle prettily on the floor.  I have no idea how I figured it all out, but I did.  I omitted the lace trim along the seam with the bodice since I was going to have to insert the lace train. It's a little hard to see in the photo but I flipped down the top of the lace so it had a nice ruffle along the inserted seam in the back.  I finished the train with matching trim and then sewed in a hook and eye to bustle it... which is something I always do backwards.  This costume was no exception. I then hand sewed it small plastic spiders scattered into the lace.  Bats would have been better, but they had spiders at the Dollar Tree so that's what we used.


The bustle hooked up. 
This was Halloween night, when it was POURING rain outside, so I was damn pleased with myself for thinking of the bustle.  Note the lace now has a totally trimmed edge.

Notes on the project:  The only real issue I had once the dress was made was the length.  It was about a half inch to an inch too long and she had some problems at school with it.  Because of the weather we trick or treated only a few houses in town so it wasn't a huge hindrance at night since she was lifting it to avoid puddles anyway.  She wore black wrist length gloves which completed the look.  Fake vampire teeth were rejected-  too much spit according to Abby.  I also hot glued the hell out of a otherwise blank black crown adding tons of rhinestones and spiders.

Cost:  I got all the fabric (black stretch velvet, dark red shantung and the matching red lace) on sale.  I had the Velcro, the thread, hook & eye, and reels of black lace trim in my stash at home.  Total cost including the dark princess tiara, gloves, spiders, rhinestones and face make-up was around $80-90.  I'd estimate this costume took me around 16 hours to complete.  If you know what you are doing and actually follow the pattern I'm sure this would take way less time.

Verdict: Success!  It was exactly what Abby wanted which was a vampire costume that was pretty and not too scary.

Abby (The Vampire Princess) and Henry (Alien in Flying Saucer) give the camera their best Halloween scare faces!


Tuesday, July 31, 2012

Wedding Crafts: Jam Jar Labels, Flower Girl Barrettes, & Bolero

No posting because I've been swamped with other tasks, mainly related to my fabulous sister-in-law's equally fabulous wedding the end of last month.  She got engaged while we were all in Paris last year and pulled off the largest, most amazing wedding this year.  Personally, I was engaged for five years, so... she's just an overachiever as far as I'm concerned!  I also went on vacation for awhile and have been generally spending all my free time in the pool. Summer is sweet, but almost over.

Wedding stuff!  In addition to making the labels for 300 jars of jam in five flavors and two sizes, I helped tie/hot glue the raffia to them for the place cards (I thankfully had nothing to do with that massive seating chart).
Tip for wedding beginners:  Combine the favor and the place tag  and save room on the table for important things like wine and food and wine.

This was the version the happy couple chose;  still think I would have gone with a simpler design myself, but this did have the advantage of the jam flavor listed for the guests.

But mostly my time was spent corralling my (adorable) children in their roles as a ring bearer and a flower girl.  I made the three girls' bow barrettes. They all have super fine, super thin hair. My mother-in-law wanted really understated bows, made with a specific translucent ribbon, which is exactly the opposite of what I would have done, but they were cute on the girls so my stress about it was stupid.


Henry & his fellow ring bearer looking gentlemanly.  I had to do nothing for the boys.  Thankfully.


My nieces sporting their handmade hair bows- constructed with love and a heavy sense of anxiety by me.

In between those actually necessary wedding tasks, I made myself this bolero to wear over my dress.
I wanted to make the bolero a little less formal as I was afraid that my dress was too cocktail.  I used Simplicity 3921, though I made a few changes to View C. I used a cotton polka dot fabric to dress it down and lined it with a coordinating costume satin.  I shortened the sleeves and narrowed them; I don't think a wide sleeve is all that flattering.  I also expanded the front curve to accommodate my bust line without having to make darts.   I skipped blanket stitching the edges because... who would do that?  


Trying out different sleeve lengths.  Please ignore the unfinished dress underneath-  still working on that.

Flipped open to see the lining.  The cheap costume satin worked fine and looked way better then most lining fabrics would have looked.


The only trouble I had with the pattern were the instructions on how you attached the sleeve lining to the sleeve at the opening.  I followed the directions word for word multiple times and always messed it up, so I just hemmed them together, made some narrow bias tape, and called it done.  I would really like to figure out what I was doing wrong.  In the end I never wore it. HA!  I'm an idiot.  


I will now be making all my own wraps.  Suck it, Macy's (tiny evening-wear-accessory-department)!


Random picture:  Abigail drinking milk at the Barndiva bar before the rehearsal dinner. Yes, she's winking and  yes, she ordered that milk from the bartender herself.   She LOVED being in the wedding party.


Sunday, March 18, 2012

St. Patrick's Day: Little Girl Evening Gown

An elegant dress for a four year old, isn't it? We added the shamrock sash and glittery crown for that oh, so sophisticated touch. And who needs shoes anyway?  Footwear is so cliche. 
The Shamrock Princess- so regal.  She is above looking at the camera.

Actually, my husband and I attended a big fancy-shmancy party last night where after a few hours I was wishing desperately shoes were optional.  I really do hate heels. 

The back.  In person the green is more electric then it is showing up in photos.  I should have made a fake bow for the sash, didn't occur to me until right now.  The sash kept slipping during the day so I should have inserted little loops in the side seams to keep it at her (non-existent) waist.

I realized Friday afternoon that I haven't made Abby anything in ages and felt kind of guilty. I got a bee in my bonnet and whipped up this dress.  It is made with the cheapest costume satin ever produced which I think I bought last year imagining I'd make a Tinkerbell costume for her.  The sash is leftover from Viv's jumper, one of three St. Patrick's Day projects I did last year.  I'm slacking.

No sash = pleats in action!

Notes on the project:  Used my turning tool for the first time with the sash, though I'm pretty sure I used it wrong, but whatever, it was long and pointy.  Used the same bodice pattern from Little Girls, Big Style I've used before (it is a really easy pattern, I recommend for beginners highly) and I made the same mistake I did before which was not make the straps more narrow.  I think they are just too wide, or perhaps Abby is just that slight.  I've made a note in the book now so I'll remember if I do it again.

I did pleats instead of gathers for a more neo-classic look and made the skirt longer for the "gown" effect and wider to accommodate the pleats and so cut the two sides of the skirt at 25" X 25" each. I lined bodice with muslin, but not the skirt. The only other change is the buttons:  I couldn't find my button-hole foot (I didn't look too hard) so I just sewed in Velcro and put fake buttons on the outside.  I think in the future I'm just going to put a zipper up the back of the bodice and sew the straps into both sides.  It will look a lot neater. 

Cost:  Took me maybe three hours?  Maybe four-ish.  Went way faster then last year's St. Patrick's Day dress and was considerably less stressful.  I already owned all the fabric and it wasn't terribly high quality so I'd guess $5.

Verdict:  Preschoolers do not need evening gowns.  It is a tripping hazard.  That said, success!

This is Abigail's fake beauty queen reaction:  "I can't believe I won!  Little ol' me?!"

Monday, March 12, 2012

Sewing Sofa Slipcovers: Part 1

This project is a huge pain in the ass.  I'm not finished yet, but thought I'd share what is done so far and how I did it in an effort to restore my enthusiasm.  If nothing else, this project has done its job of keeping me occupied and off the Internet. 

Let me begin with a warning:  do not do this.  Or, okay, do it, but only if you really cannot afford a new couch.  I should have just bought new furniture (yes, wasteful, but dear lord! Way easier).  I guess if you are a great seamstress and have endless free time and no kids or no need to sit on the sofa in question for days and days then, sure, you can give it a go.  Otherwise, seriously, Pottery Barn is your friend. 

This is how 40 yards of 54" fabric is shipped to you from Fabric.com:


I'm only 5 feet tall.  This is nearly a third of my body weight. Awkward isn't really strong enough of a word. 

If you follow any sort of "real" directions you will at this point be measuring out everything before cutting.  The math worksheets inside "Custom Slipcovers Made Easy" ought to earn you college credit. At least a unit.  Needless to say I did not do any of that.  Instead, I followed the "Lazy Girl's Guide to Custom Slipcovers" and just did some draping and cutting.

Down the back I have a good 2.5 inches onto the floor.  I regularly have my couch vacuumed and steam cleaned because that's how I am, but I realize that is not typical so remember to vacuum and clean well before you start because you don't want to be doing it in the middle.

Since the fabric is a solid color I just railroaded it which makes things much simpler.  If this is your first slipcover (like me) DO NOT choose a pattern.  Just don't.  It is already enough work.   Remember you want to drape the fabric inside out.  The backside of my fabric is a bit lighter then how it will actually look.

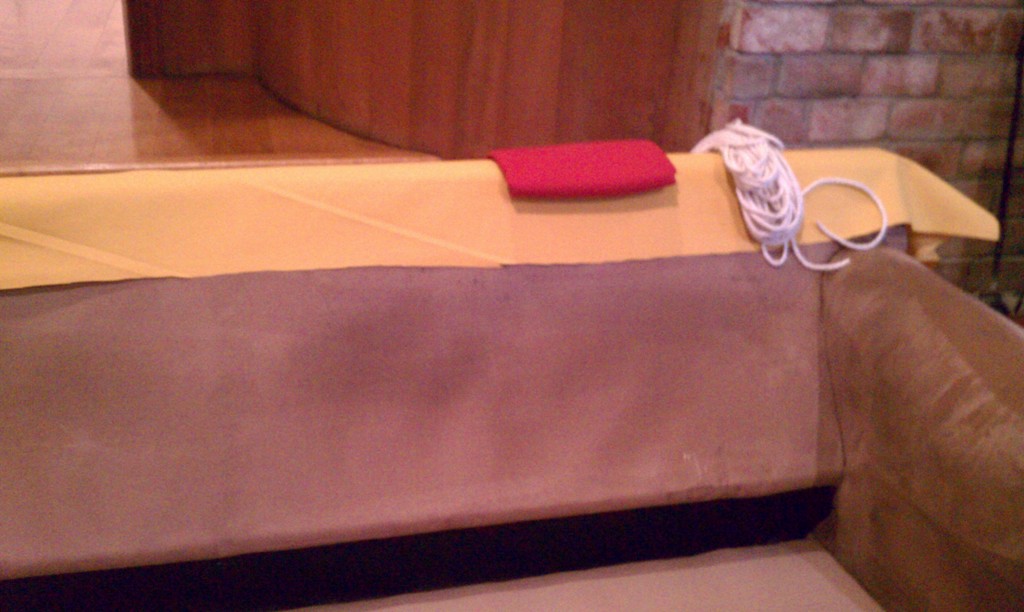
More draping and pinning. In this photo four sections:  outside back, right arm over,  inside back and bench.   Cushions are removed in this photo and I believe were being made into fortresses in front of the TV at this point.

Instead of draping the inside back all the way down onto the bench I put a seam between the bench and the inside back.  My reason for doing this is that my bench could then drape all the way to the floor without a skirt.  Ruffles aren't really my style.  The important note here is that you have to make sure the bench piece is wide enough to wrap around the outside to meet with the side pieces (not in the above photo yet).  You'll have to trim quite a bit around the inside arms, but it will be better then having to piece together yet another bit of fabric. 

All these pins are wrong.  Every single one.

Here is a tip for beginners that ought to be tattooed on my face:  RIGHT SIDES TOGETHER.  I pinned across the back and along the inside arms before realizing I'd pinned it wrong.  Yeah.  That was rough. I was too busy trying to get it straight and tight.  A stupid mistake that cost me a chunk of time.  Another hint:  you will pin your hands.  It will hurt.  Drink wine.  It will help. 

I used something like 300 pins.  My fancy magnetic pin cushion was worth the investment.  I love mine!  I can't imagine what I would have been doing without it.  Individually poking them into my standard tomato?  No thanks. 

"Lazy Girl's Guide" is skimpy on some details which becomes evident once you are trying to fit the fabric around curves and along angles.  I had to make darts along the corners which wasn't difficult or anything- just wasn't in the directions.  This is where the overwhelming detail and complicated techniques in the "Slipcovers Made Easy" book are helpful in pointing you in the right direction.  Not that I was going to be doing faux-box corners or anything, but at least I knew I wasn't crazy that it wasn't looking right without the darts. 


Cutting bias strips is difficult since my cutting table isn't actually wide enough to cut 42" fabric at a full 45 degree angle.  I cut half than flipped the fabric and cut the other half.  It worked.  Don't use disappearing ink as it'll be gone before you get to cutting.  Use tailors' chalk.
After that initial bout of pinning, I needed to pin the arm fronts which I needed welting in order to complete.  I considered making the welting the easy way, just folding fabric straight over cording, but in the end decided that I was going to make it the right way, encased in bias cut strips that were pieced together one at a time.  I did try to figure out how to make continuous loop bias tape to save some effort, but after watching video after video on YouTube I was still confused and so nixed that too.  I did use my rotary cutter for the first time since I failed with it early last year.  They were using rotary cutters in all of the videos so I picked up some tips on how to use them properly, if not how to make the loop.  Kind of in love with it now. 

Another totally awesome tool to use when making your own welting or piping is this do-dad: 

My bias strips are two inches (roughly, even with the rotary cutter some are a little straighter then others) and the cord is cotton piping in size 8/32.  The 4th grade math student in me so wants to reduce that number properly.

The do-dad is magnetic so sticks to the base plate and pushes the cording up along the zipper foot nice and tight.  I have zero idea when or why I purchased it, or what it is really called, I just happened to find it among my notions while searching for my zipper foot and was pretty stoked I had it.  It will also help you gather pins when you leave the magnetic pin cushion in the other room.  FYI. 


I made 7.5 yards of finished welting.  The whole process, cutting bias strips and sewing, took me about 3 hours.  I will need to make an additional 20 yards for the cushions and then double the whole amount for the second couch.  Yeah.  That should be 10-12 hours of work I imagine.


I then pinned the fronts to the arms inserting the welting along the seams.  I cut into the arm drape where I wanted to run the welt horizontally across the side of the couch.  That was unnerving since I'd already pinned the inside of  the arm to the bench and inside back and was concerned I'd mess it up and have to re-do all the work. 


This eats up pins like crazy.

After all the pinning it is finally time to sew.  Now in "Lazy Girl's Guide" she bastes all the seams by hand before taking it to her machine.  That sounded like a good plan to me so I tried it.  Terrible.  I don't know what I did wrong, but something was not right.  I kept snapping the thread and was really burned out with the whole effort.  I quit basting after one one arm.  Maybe I should have taken a break. 

In "Sewing Made Easy" she doesn't baste, but does outline with marker where she wants the seams.  The problem with that is you have to plan ahead of time how you intend to put the fabric through the machine which spatially I cannot do.   Unless she was doing it on both sides of the future seam?  Maybe that would have worked.  Anyway, I said screw it and dragged the pinned mess to my dinning room.


I'm telling you:  buy a new couch.  Ballard Designs, slipcovered "Davenport" $999 for the frame $280-450 for slips.  Sure, no down cushions, but no million pins pricking you either.


This was difficult.  And all kinds of disastrous.  There is simply way too much fabric!  A tip for beginners (that I will be using on the second slipcover):  pin one seam at a time, sew, check the fit, then pin the next seam, sew, check the fit, repeat-repeat-repeat.  It may seem more time efficient to pin all at once and then sew it all at once, which it may very well be, but don't do it if you don't know what you are doing.  

Completely exhausted, I turned it right side out and put it on the couch.  It did not fit well and I had bunching where I'd sewn through two layers on accident in several places.  I did not take a picture because I was pretty sure I was going to give up.  Wish I had now. (Taken photos, not the giving up.) I talked myself into trying to fix it after a couple of days of moping.  I had to rip out and re-pin a bunch of seams, all of them along the arms.  

Cushions back on the couch. We use this room on a daily basis for hanging out and watching TV, playing games, etc. It being off limits for an extended period of time was not possible so we just used while pinned up.

 
You can see how much brighter the yellow and dark coral will make the room.  One day.  Far, far in the future.

Part 2 will be the cushions and I hope to do them this week.  We'll see how it goes with my time.  And then, of course, I have to do the second couch.  Good grief!


Linkys:

NightOwlCrafting


Monday, January 23, 2012

2011: The Year I Learned to Sew

My mom loved this stupid blog despite the fact that I update only when I feel like it, make no effort to promote it and take horrible pictures, usually with my phone.  She died the day after Christmas; she was 56.


In fact, my mom loved all my lame attempts at making stuff.  My Etsy shop was a thrilling endeavor in her eyes and she'd patiently been waiting for me to hurry up and finish a damn novel since I was ten. For my 35th birthday in October she and my siblings bought me (a sure to be awesome) serger that ought to arrive in the next week.  I'll be posting my enthusiastic attempts at creation with that machine too, so watch out Internet.   

I haven't made anything yet this year, still working things out in my mind and haven't had the focus or drive, so in the meantime, here is a rundown of the sewing and craft projects that didn't make the blog in 2011 because I couldn't get my act together to get them up:

1.  Abby's mermaid costume:  made for a winter-time "Mermaids & Pirates" themed birthday party thrown by one of her best little friends.  The dress is a simple pinafore in crushed panne velvet.  It is unlined because I figured she'd only wear it once anyway.  I used an iron on mermaid patch that Abby fell in love with at the fabric store on the front and used Velcro down that back instead of buttons.  I had many things going on at the time so pictures are what the are:

Best full length photo I took, sadly.


Poor Ariel had to field a lot of questions about how she can live underwater.

Abigail the Angry Mermaid:  Nap time!
The fin is made of some sort of sparkly synthetic material and backed in the same crushed velvet-  trust me, it was awesome, despite how it might look in these photos.  I made it without a pattern, just drew it on the back of the fabric (on the fold so that it would be symmetrical).  I inserted matching ribbon so that it could be tied on like an apron and easily taken off if she wanted to ditch it (she never did).  I stuffed the bottom of the fin with fabric scraps.  If I made this again I would use thick batting instead so that it wouldn't shift as much.  The shell necklace is a souvenir from a long ago trip to Hawaii and finally had a real purpose.  The most fun for me was the hair clip which was made in about 15 minutes right before the party.  I'll be making way more of these, just better. 

2.  My Cleopatra costume:  made for Halloween, I didn't finish it in time because Abby got sick and I went instead as the Statue of Liberty, a homemade costume I purchased the year before.  The Cleopatra dress is made with crepe back gold satin (very pretty and high quality), lined in bleached muslin and absolutely festooned with tacky rhinestones. 


I used a fantastic product called "Jewel It!" to attach the sparklies.  It worked great and is completely washable. 

The weird cape/wrap thing wasn't easy to sew.  The material is terrible.  The Greek key ribbon looks okay now, but it was an absolute pain in the ass to attach properly, both at the bodice and along the edge of the skirt lining.  Fitting it was ridiculous because I don't have a dress form.  I'd have to mock it up in muslin and then try it on and awkwardly pin and mark myself using the mirror in the bathroom.  Eventually I found it easier to take photos of myself in it so that I could see the how it fit without contorting my body and messing it up.   A dress form is definitely on my list of things to look into in 2012.


Tip for beginners:  The least effective way of fitting a garment is to do it on yourself with a cellphone.

3.  Canvas chalkboards:  I have a joke of a number of standing appointments each day- kids to school and back, gym classes, lessons (piano, dance), sports (soccer, t-ball), personal training, therapy, doctor's visits, vitamin shots, etc.  Oh yeah, and work!  I realized at some point that my husband had NO IDEA what I was doing everyday or why I was always running out the door again.  I bought a set of pre-stretched canvas squares at Michael's and painted them with chalkboard paint leftover from the Library Book Box


They've gone crooked a bit, haven't they? 

Abby is my Cleverbucket and Henry is my Smartypants.  FYI.

I used a sponge brush to cut down on brush marks, but if you look real close you can see them.  It took a couple of coats.  Writing on them was not as easy as I'd hoped since there is no backing to press down on in the middle, but the chalk pens worked okay. These serve as a basic template to each day of the week.  There are always changes and things come up but this is the outline of my life. 

The list of rules for what needs to be done when we get home from school each day has worked especially well with the kids.  I just point to it when I get any fuss about changing out of uniforms or getting snack before lunchboxes are cleaned out.  For whatever reason the fact that the rules are posted makes it harder for my kids to argue a point, despite the fact that they can barely read.  Rules on chalkboards work well in the playroom too.  These were made reusing the Dollar Store chalkboards from Abby's birthday party.


4.  Kid's chore charts:  same goes with the chore charts, having them posted makes getting them to do it way easier!  I made these with my Cricut and a laminating machine.  I've had this set up close to a full year now and it's stood up pretty well.  They are velcroed to the file folders and then hung on clipboards in the kitchen.  I made a few blank ones so I could write down any special tasks or things they don't need to do regularly with a dry erase pen.  At the end of the week they get a coin (penny or quarter whatever I have on hand) for each star on their chart. 


Mostly pictures because I made these before Henry could read at all.

The book and pencil used to be for writing practice but Henry now interprets it as homework.  Which he has everyday so I need to make more.  I never had homework in Kindergarten! 

Clorox wiping the door knobs is probably her most serious "job".

Stars!  I should earn some stars for making them do their chores- that's the hard part after all.
The only downside to the chore chart system is that you have to monitor and enforce it as the adult and a lot of times I'm just too lazy.  Chores are done haphazardly in our house.  Some weeks I'm on it with the kids, other weeks, not so much, but they are still really young and the chores (other then feeding the dog and brushing their teeth) are not exactly high priority jobs or even really "jobs"-  more like "life tasks" that will get done regardless of whether or not I chart it.  I've found being lazy is the biggest impediment to good parenting.

5.  More Doodle Stitching:  I worked on these while at the hospital with my mom.  They were already traced out originally for Abby's mermaid costume.  As a person who has spent a lot of time in hospitals (and I have in the last several years, way more then I'd wish on anyone) I will tell you that eventually you find yourself  bored out of your mind.  It is a particularly draining kind of boredom since it festers beneath worry and helplessness whether you are the patient or not and I have been both.  Embroidery is the perfect task in that it is portable and easy to start and stop.  It is both mindless and focused. 


I have no idea what to do with these now.  More nautical hair clips for Abby?
Embroidery keeps you busy, but keeps you in the moment-  it isn't engrossing in the same way a book might be and you can chat and seem generally available to nurses/doctors/family/friends.  I did forget to bring both scissors and thread though.  Tip for (hospital) beginners:  dice and a pen and paper can save you from terrible anxiety.  My sister keeps dice in her purse (because she's awesome) and she once kept me company in a surgical waiting room by playing Kismet for, like, three hours. No joke. Also no joke?  I bought a pound of dice from Amazon for my husband for Christmas. 


I should organize this drawer.  This looks like we are hardcore gamblers. 

He was... confuzzled.  I thought it was a fun gift!  Who doesn't like dice?  I still need to throw a Farkle party.

Upcoming Projects: Not Yet Blogged

a rundown of what I've been up to: DIY wedding dress, "Back to School Night" decor, Flower Arranging for the Incomptent, more jam labels, a dog bed solution, paper embroidery, flying pig needlework, attempting to scrapbook, make your own board game kit, Link from Zelda costume, organinzing for homework, and how to build an afterschooling program!

how to declutter after a death... and how not to do it

what do you do with all your fat clothes? Make doll clothes!