Showing posts with label spray paint. Show all posts

Tuesday, November 1, 2011

Halloween 2011: Homemade Kids' Costumes FINISHED!

 Halloween did not go smoothly this year.  My daughter and I are both sick.  Poor Abby has missed a week of school.  My husband lost me and was nearly convinced I'd been kidnapped (I was waiting for him at the end of our driveway... with a flashlight).  My costume is only 90% done on November 1st.  We only trick or treated about 6 houses in total.  It took us longer to drive into town. All in all, a poor showing considering the amount of forethought put into this holiday. That said, the kids sure looked great!

No jacket version with whip and idol.

Henry's costume was a huge hit at his school.  He had to leave the whip at home since it is technically a weapon, but he brought the legendary artifact, "The Glittering Gargoyle".

I tried to get Henry to make up an adventure to go with this "artifact" but his tale sounded suspiciously like the beginning of Raiders of the Lost Ark. "And then there is traps!  And a big rock!"  He knows better then to mess with a classic, I guess.
This was made with a Dollar Store statue, some gold spray paint and about a thousand rhinestones.  And hot glue!  I burned the hell out of my hand before realizing it was way easier to spread the glue directly on the statue instead of trying to dot glue to the back of each tiny stone.  I'm an idiot. 
Indiana Henry prepares for adventure surrounded by his sidekicks.  His "girlfriend" is the mermaid on the end.  Dr. Jones is a ladies man.

Jacket version.  I have no idea why he is winking. He's a charmer!
The whip started life as a complicated five strand weave.   I was using a two lengths of yarn for each "strand" so that it would be thick enough.   This was a disaster that required a glass of wine before I started over.  I gave up on the 5-strand/pair approach quickly.  I ended up braiding two sets of three and then plaited them with another set of two strands of upbraided yarn to make it.   The handle is duct tape as you can see, (which was super stable and by far the easiest way to make a handle).  The tape was wrapped in black ribbon in an overlapping x-pattern at one point, but that did not last until today.  I'm too lazy to re-do it so you'll have to trust me that it looked fine. 

Pumpkins from the garden behind her... we never carved them.  We're slackers.

Snow White, while very ill, posed like a champ for these photos.  Her collar and cape were made without a pattern because, again, I'm an idiot.   I buy patterns and then just do what I want, apparently.  I've yet to follow an entire real pattern.  I alter the hell out of them despite the fact that I don't know how to sew.  I have no excuse!  Her accessory here is a tweeting blue bird like the ones that follow Snow White around.  Abby also has a plastic poison apple that did not make it into the photos.

Don't forget the sparkle shoes! 

The collar I drew freehand straight onto the satin and used standard interfacing on both pieces to make it stiff.  To get it to fold over properly, i.e. to frame her face but not block her vision, I sewed small pleats into each edge.  I used Velcro to attach it to the inside of the dress-  I sewed the prickly part to the collar and ironed in no-sew Velcro (soft side) into the dress.  If I'd been smarter I could have sewed it to the lining before assembling the bodice, but I didn't think of that. 

The cape, since I didn't follow the pattern, was super easy.  I seamed two rectangles of red stretch velvet together and used a simple hook and eye as a closure.  To keep it from falling over her shoulders and obscuring the laborious puff sleeves I tucked the edge into the back of the dress between the collar and the bodice- the fabric hooked a bit on the Velcro hidden back there and so didn't slip out.  The cape didn't serve to keep her warm since I didn't have it covering her arms, but it was nice enough here in California that it didn't matter.  The velvet draped really well and I'm glad I didn't use more of the cheap satin. 

A grand curtsy.

Notes on the projects:  Indiana Jones was easy, in part because I bought the pants, shirt and jacket... which is kind of the whole costume.  Really I only made the whip, satchel and idol.  But I did hunt down the hat!  Snow White was much harder and required a whole list of things I'd never done before, including (sort-of) using a commerical pattern and all that entails:  a tracing wheel and pattern paper, cutting notches and matching dots, etc.  Plus, the dress itself required me to sew darts, make sleeves and do insets all of which I'd never done before.  I also tried corded gathering for the first time which didn't work out and I was forced to take in the bodice (alterations!)  and use all sorts of materials I'd never worked with (velvet, satin, metallic trims).  If I made Snow White again using this bodice pattern I'd for sure raise the neckline and narrow the shoulder width.  Oddly, there was never any directions for sewing a seam up the back of the bodice which was weird, but I guess it is pretty clear that it needs to be done.  The true work was done by my housekeeper who cleaned up after me.  It's amazing how many bits of thread and scraps of fabric I can create making small children's clothes.

Verdict:  Boo!  Did I scare you?  Halloween rules.  Learned a ton making these costumes.

Cost:  I estimate these costumes cost me between 2,000 pesos and a gazillion euros.  Maybe 600 galactic credits?  I really don't know.  A LOT is the answer. 

Update on Cleopatra as soon as it's finished-finished!  It's crepe-back gold satin and bejeweled!  I know you can't wait.

Saturday, August 6, 2011

Other Crafts: Super Easy Lego Table & Doll Bed

Other Crafts!  These two were super simple and a hit with the kids.  These are what I like to call Weekday Projects- I can do them on a weekday afternoon, start to finish with little to no direction.

LEGO TABLE

My friend Holly, who is quite crafty herself, mentioned the existence of such a thing a couple of weeks ago and how expensive they could be.  So I got home and Googled it and found she was totally right.  Outrageously expensive.  $250 outrageous.  But, I also discovered a bunch of DIY Lego tables that looked awesome.  Really awesome.  Most of them required power tools and a whole bunch of space once it was complete to store it and I wasn't up for either of those.  I needed easy and small.  So I took matters into my own hands and made this in less then 15 minutes. 


I know better then to move blocks during construction so this photo is candid. It's a big surface with a small footprint.
Not difficult in the least.  I used museum putty (to avoid both math and glue) to secure the Lego base plates to the top of a Target Ikea "Lack" knock-off table and my son was THRILLED.  Big Mommy points for me!  The museum putty is really stuck in case it strikes you as flimsy.  The plates don't lift or move at all and if I ever wanted to I could remove them.  My word of advice is one that only became obvious once I started piecing the plates together- they need a bit of space between them, ever so slight, so that legos will fit across the plates evenly and lock like they are supposed to lock.  The best way to get the distance right is to attach a block across them as a guide while you're puttying up the plates.  Since my table was white and I used white museum putty you can't really see it between them- if you had a different color table you could always use clear museum gel instead. Or really commit and use glue.

if you look close you can see the slight, very necessary gap between the plates.

Cost:  $39.11 (each of the base plates were $6.53 which is really a form of Danish terrorism, right?)

Verdict:  Legos are the most amazing quiet time toy ever.  Should have made this a year ago.


DOLL BED

Abby has been wanting one forever but I couldn't find one that was the right size or that wasn't made of plastic or plywood.  Even those I did find were way too expensive.  $78 for a doll bed and blanket, plus tax and shipping?  And I have to put it together? I kept putting off buying her one.  So when I saw this bright green solid wood Ikea doll bed for $10 I snatched it right up. 


It was violently green.  Brain searing green.  Radioactive frog green.  GREEN-GREEN.  Like greener then my startling green bathroom.

A bit of spray paint (Krylon this time, seems to work as well as the Rust-o-leum for a small project and is cheaper) makes it pink.  I'm still not doing great at the spray painting.  I did go back and fix this because it was just too drippy for me. 

not cute


much better.
I then used an extra flat sheet from my daughters' linens to make a doll duvet set to match her room.  I took foam I was going to make a dog bed with to make a mattress and covered it with white cotton as a "sheet".


Cost:  $10 for the bed, $4.99 for the spray paint, everything else I had on hand already.  Took me probably an hour to paint, sew and stuff everything.  If you are curious you can buy the doll bed at Ikea un-painted for $20, no mattress. 

Verdict:  Super fun!  My daughter loves that it matches her bedding and I love that it didn't cost me a fortune and isn't plasticky.

Linkys:

Friday, June 17, 2011

Other Crafts: Library Book Box with Chalkboard Due Date

In blog news, finally customized my header and shifted around my template a bit.  It's awfully pink, isn't it?  But it feels happy and I like it for now.

On to those other crafts I really have no business doing!  I take the kids to the library pretty often which makes me a good mom.  However, I frequently return books late which makes me a bad library patron.  This character flaw persists despite the fact that I spent years working in libraries.  Blog confession:  I had to pay for a book I checked out from UC Berkeley- WHERE I WORKED- because I lost it.  See?  Bad library patron.  And awkward conversation with your boss. 

I want to instill the same love and respect for books and learning in my children that I have, but would prefer if they didn't inherit my poor return habits.  I also hate realizing I need to return the books and then having to tear apart the house in a frenzy (because they are late) trying to find them. I needed a spot to keep them all together and a reminder of when they are due.  So this is my solution:

No more misplaced or overdue library books!

It started life like this:

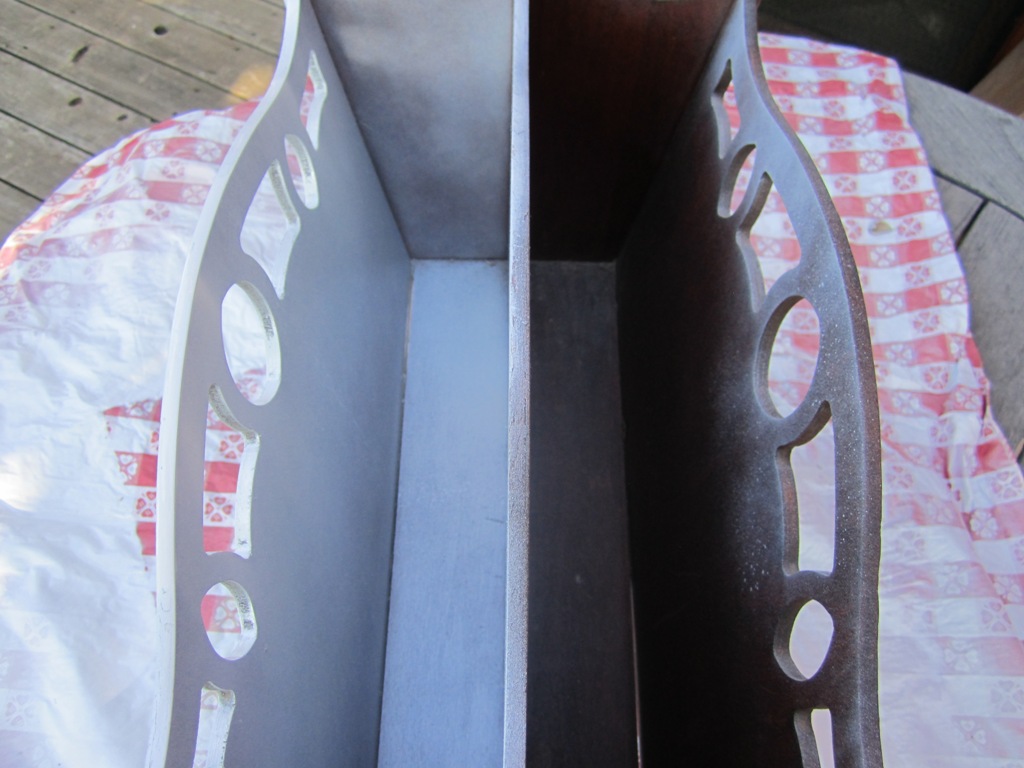
The wood looks pretty nice in this picture.  It is not.

I bought the magazine rack at an antique shop in town. Thrift shops seem to be littered with them, they must have been a '70s household staple, but like ashtrays that also clutter up second-hand shops, nobody uses them anymore.  As a nation we've apparently quit smoking and canceled our magazine subscriptions.  I was able to talk the owner down to $5 by playing the "hey, I'm a local, possible return shopper and I've got cash" card.  Sometimes it is good to live in a tourist town.  I liked the shape of it, with the little cutouts and it seemed sturdy enough for books.  A lot of the other old magazine racks I'd found had slat sides which I think can look a little messy once things are in them. Unfortunately, when I got it home I saw that the dark wood grain was hiding some flaws.  There was some warping in the wood and some general gaping.  But I figured that was fine since I was going to paint it anyway.

After seeing some of the amazing things people do with spray paint I decided I'd rather try that then break out my waterborne enamel.  Benjamin Moore Impervo is my secret love.  Last year I painted all of the dark redwood trim in my 4,000 sq ft house with it, but enamel is a lot of work.   Spray paint was fast, but it doubled the cost of the project pretty much.  I'm not sure if it was the fault of the less then perfect condition of the wood or my spray paint inexperience, but I got some weird cracking on my second coat (I waited 24 hrs in between so it wasn't wet).  It ended up looking like I'd glazed parts of the finish which is really not me.  I considered sanding it and repainting but I'm lazy, as discussed earlier, and so I just let it be.

The trigger is nice, but it's only 12 oz which isn't much.  I'll try a different brand next time.

  First coat.  At the bottom you can see some of the gapping.

After another day of drying I taped off squares and painted them with chalkboard paint. I've never used chalkboard paint before although I've had this can for months now.  The consistency is a little weird.  It's thick and has the viscosity of watered down pudding.  It's latex based so when I dripped on my work table I was able to wipe it up easily which was nice.  I used a foam brush to keep brush strokes to a minimum.  Even with my careful application, the paint bled in the wood grain, seeping into some, but not all, of the grooves.  Uneven and not cute.  Again, not sure if my taping wasn't up to par or if the wood was just not meant to take it.  My sharp squares weren't too sharp.  I nearly gave up on the project at this point.  It wasn't turning out like I had figured in my head which is why there are no pictures.  I waited another day and then decided to try to salvage it.  I used a smaller brush and just painted bubbly circles over the bleeds.  Again, not me.  I wasn't feeling it at all. 

You can see some of the uneveness in the wood and the crackling in the paint in you look close, bottom right hand corner and middle at the top. 


You have to wait 3 days to condition the chalkboard surface (you just rub it with the side of a piece of chalk to build up dust- doing it I remembered seeing teachers in elementary school do this after their boards were washed once a year).  The result of the conditioning is what saved the whole thing for me!  So, tip for beginners:  chalkboard paint doesn't have half the charm without the chalk.  It made a huge difference in the feel of the piece.  The stark black and white was transformed into a well loved schoolhouse-inspired look that made the effort worthwhile.  It's not perfect, but it is exactly what I needed.  It's imperfection will just keep me from freaking out when it gets knocked over with a soccer ball.


Cost:  Took about 6 days to finish because of drying times.  $5 for the piece, $12.50 for the spray paint.  I already had the foam brush, chalkboard paint (and used very little of it) so I'd say, total was less then $20.  Will probably pay for itself in avoided library fines.

Verdict:  Cute! Useful! Book-a-rific!  I need to work on my spray paint skills and now have to come up with something to do with the rest of that chalkboard paint...

BONUS:  Here's a tip to make your local librarian happy-  pass the books across the desk and don't return them in the drop box if you possibly can.  Emptying those boxes is a pain in the ass, especially if you are already standing behind the circ desk with a bar code scanner in your hand.

Linkys!


Upcoming Projects: Not Yet Blogged

a rundown of what I've been up to: DIY wedding dress, "Back to School Night" decor, Flower Arranging for the Incomptent, more jam labels, a dog bed solution, paper embroidery, flying pig needlework, attempting to scrapbook, make your own board game kit, Link from Zelda costume, organinzing for homework, and how to build an afterschooling program!

how to declutter after a death... and how not to do it

what do you do with all your fat clothes? Make doll clothes!