Showing posts with label piping. Show all posts

Monday, March 12, 2012

Sewing Sofa Slipcovers: Part 1

This project is a huge pain in the ass.  I'm not finished yet, but thought I'd share what is done so far and how I did it in an effort to restore my enthusiasm.  If nothing else, this project has done its job of keeping me occupied and off the Internet. 

Let me begin with a warning:  do not do this.  Or, okay, do it, but only if you really cannot afford a new couch.  I should have just bought new furniture (yes, wasteful, but dear lord! Way easier).  I guess if you are a great seamstress and have endless free time and no kids or no need to sit on the sofa in question for days and days then, sure, you can give it a go.  Otherwise, seriously, Pottery Barn is your friend. 

This is how 40 yards of 54" fabric is shipped to you from Fabric.com:


I'm only 5 feet tall.  This is nearly a third of my body weight. Awkward isn't really strong enough of a word. 

If you follow any sort of "real" directions you will at this point be measuring out everything before cutting.  The math worksheets inside "Custom Slipcovers Made Easy" ought to earn you college credit. At least a unit.  Needless to say I did not do any of that.  Instead, I followed the "Lazy Girl's Guide to Custom Slipcovers" and just did some draping and cutting.
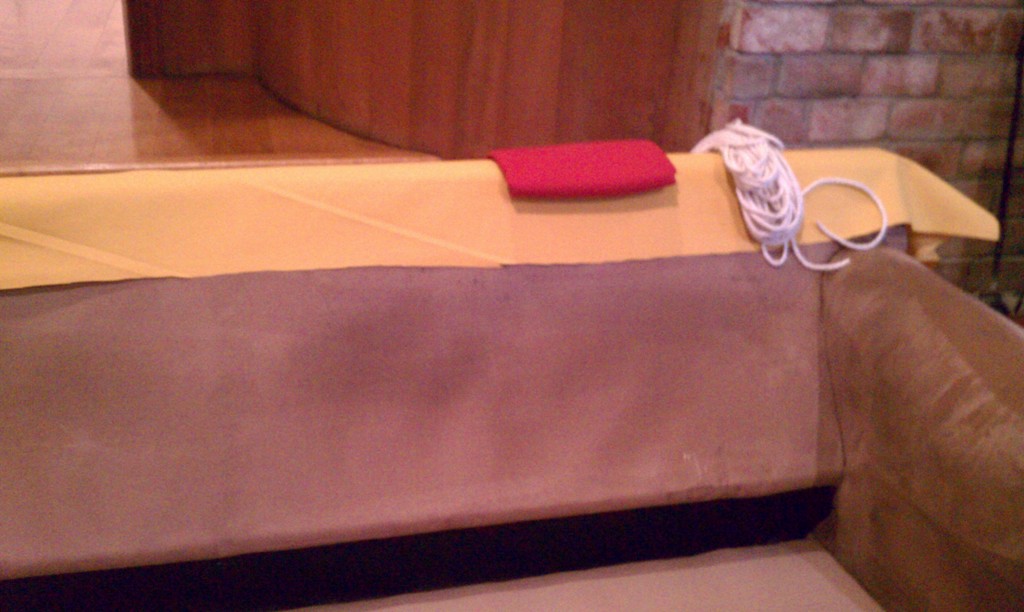
Down the back I have a good 2.5 inches onto the floor.  I regularly have my couch vacuumed and steam cleaned because that's how I am, but I realize that is not typical so remember to vacuum and clean well before you start because you don't want to be doing it in the middle.

Since the fabric is a solid color I just railroaded it which makes things much simpler.  If this is your first slipcover (like me) DO NOT choose a pattern.  Just don't.  It is already enough work.   Remember you want to drape the fabric inside out.  The backside of my fabric is a bit lighter then how it will actually look.

More draping and pinning. In this photo four sections:  outside back, right arm over,  inside back and bench.   Cushions are removed in this photo and I believe were being made into fortresses in front of the TV at this point.

Instead of draping the inside back all the way down onto the bench I put a seam between the bench and the inside back.  My reason for doing this is that my bench could then drape all the way to the floor without a skirt.  Ruffles aren't really my style.  The important note here is that you have to make sure the bench piece is wide enough to wrap around the outside to meet with the side pieces (not in the above photo yet).  You'll have to trim quite a bit around the inside arms, but it will be better then having to piece together yet another bit of fabric. 

All these pins are wrong.  Every single one.

Here is a tip for beginners that ought to be tattooed on my face:  RIGHT SIDES TOGETHER.  I pinned across the back and along the inside arms before realizing I'd pinned it wrong.  Yeah.  That was rough. I was too busy trying to get it straight and tight.  A stupid mistake that cost me a chunk of time.  Another hint:  you will pin your hands.  It will hurt.  Drink wine.  It will help. 

I used something like 300 pins.  My fancy magnetic pin cushion was worth the investment.  I love mine!  I can't imagine what I would have been doing without it.  Individually poking them into my standard tomato?  No thanks. 

"Lazy Girl's Guide" is skimpy on some details which becomes evident once you are trying to fit the fabric around curves and along angles.  I had to make darts along the corners which wasn't difficult or anything- just wasn't in the directions.  This is where the overwhelming detail and complicated techniques in the "Slipcovers Made Easy" book are helpful in pointing you in the right direction.  Not that I was going to be doing faux-box corners or anything, but at least I knew I wasn't crazy that it wasn't looking right without the darts. 


Cutting bias strips is difficult since my cutting table isn't actually wide enough to cut 42" fabric at a full 45 degree angle.  I cut half than flipped the fabric and cut the other half.  It worked.  Don't use disappearing ink as it'll be gone before you get to cutting.  Use tailors' chalk.
After that initial bout of pinning, I needed to pin the arm fronts which I needed welting in order to complete.  I considered making the welting the easy way, just folding fabric straight over cording, but in the end decided that I was going to make it the right way, encased in bias cut strips that were pieced together one at a time.  I did try to figure out how to make continuous loop bias tape to save some effort, but after watching video after video on YouTube I was still confused and so nixed that too.  I did use my rotary cutter for the first time since I failed with it early last year.  They were using rotary cutters in all of the videos so I picked up some tips on how to use them properly, if not how to make the loop.  Kind of in love with it now. 

Another totally awesome tool to use when making your own welting or piping is this do-dad: 

My bias strips are two inches (roughly, even with the rotary cutter some are a little straighter then others) and the cord is cotton piping in size 8/32.  The 4th grade math student in me so wants to reduce that number properly.

The do-dad is magnetic so sticks to the base plate and pushes the cording up along the zipper foot nice and tight.  I have zero idea when or why I purchased it, or what it is really called, I just happened to find it among my notions while searching for my zipper foot and was pretty stoked I had it.  It will also help you gather pins when you leave the magnetic pin cushion in the other room.  FYI. 


I made 7.5 yards of finished welting.  The whole process, cutting bias strips and sewing, took me about 3 hours.  I will need to make an additional 20 yards for the cushions and then double the whole amount for the second couch.  Yeah.  That should be 10-12 hours of work I imagine.


I then pinned the fronts to the arms inserting the welting along the seams.  I cut into the arm drape where I wanted to run the welt horizontally across the side of the couch.  That was unnerving since I'd already pinned the inside of  the arm to the bench and inside back and was concerned I'd mess it up and have to re-do all the work. 


This eats up pins like crazy.

After all the pinning it is finally time to sew.  Now in "Lazy Girl's Guide" she bastes all the seams by hand before taking it to her machine.  That sounded like a good plan to me so I tried it.  Terrible.  I don't know what I did wrong, but something was not right.  I kept snapping the thread and was really burned out with the whole effort.  I quit basting after one one arm.  Maybe I should have taken a break. 

In "Sewing Made Easy" she doesn't baste, but does outline with marker where she wants the seams.  The problem with that is you have to plan ahead of time how you intend to put the fabric through the machine which spatially I cannot do.   Unless she was doing it on both sides of the future seam?  Maybe that would have worked.  Anyway, I said screw it and dragged the pinned mess to my dinning room.


I'm telling you:  buy a new couch.  Ballard Designs, slipcovered "Davenport" $999 for the frame $280-450 for slips.  Sure, no down cushions, but no million pins pricking you either.


This was difficult.  And all kinds of disastrous.  There is simply way too much fabric!  A tip for beginners (that I will be using on the second slipcover):  pin one seam at a time, sew, check the fit, then pin the next seam, sew, check the fit, repeat-repeat-repeat.  It may seem more time efficient to pin all at once and then sew it all at once, which it may very well be, but don't do it if you don't know what you are doing.  

Completely exhausted, I turned it right side out and put it on the couch.  It did not fit well and I had bunching where I'd sewn through two layers on accident in several places.  I did not take a picture because I was pretty sure I was going to give up.  Wish I had now. (Taken photos, not the giving up.) I talked myself into trying to fix it after a couple of days of moping.  I had to rip out and re-pin a bunch of seams, all of them along the arms.  

Cushions back on the couch. We use this room on a daily basis for hanging out and watching TV, playing games, etc. It being off limits for an extended period of time was not possible so we just used while pinned up.

 
You can see how much brighter the yellow and dark coral will make the room.  One day.  Far, far in the future.

Part 2 will be the cushions and I hope to do them this week.  We'll see how it goes with my time.  And then, of course, I have to do the second couch.  Good grief!


Linkys:

NightOwlCrafting


Thursday, March 17, 2011

Sewing Project: The Random, the Abandon and the Lost

I've been busy (and sick) and have had little crafty blog time lately, but have managed to mangle a couple of projects for us to laugh at together...

#1 "The Peace Pillow":


This random project was supposed to be easy and useful.  My kids attend a Montessori pre-school in town that, like all Montessori schools, has a peace table where disputes and hurt feelings can be discussed and resolved between the kids without the teacher's overt intervention.  They take turns holding the "talking flower" and tell the other person why they are upset.  I'm pretty sure, "Why don't we talk about this at the peace table?" is a phrase the teachers use often. 

I've adopted the concept for home and when the kids fight I first tell them to work it out themselves and if the screaming/fighting/taunting continues I force them to "make peace" and have them hold whatever I have at hand to take turns talking.  I often have to intervene with the warning to "make peace or you both go to your rooms!"  I thought it would be nice to have a permanent object to use and so made this pillow. 


Yeah.  Not so cute.  The embroidery is okay, but I used my own handwriting instead of transferring a font so the result is less then perfect.   The symbol is straight up primitive. The piping is wonky.  Really wonky if you must know.  It needs more color and some sort of... something.  We've used it and honestly will probably continue to use it (until I can't take it anymore and remake it). 

#2  "Glorious Bounty Dishtowel"


The most random thing I have made to date:  this is a dishtowel.  It is embroidered with two of the guys from the brilliant comic "Glorious Bounty" created in part by a dear friend of mine, the unrepentant foreigner, reformed playboy, and all around gad about town, Luke Milton.  I made it for him in response to a half-joking call for fan art.  This turned out pretty well and the back is fairly neat.  I used a few different stitches so it has some texture.  That said, it is a dishtowel.  Embroidered with a killer robot and a drunken alien.  I air dry the kids bento boxes on it in the afternoons. 


#3 "Portrait of Seth Underwood, The Red House Garden's Public Defender" 


This project I have abandon until my skills improve vastly.  I don't even know how to explain this one.   I tell a story to my kids (with their constant input) about the animals who live in our garden.  That kind of storytelling is supposed to improve their ability to follow a sequence of events, to make logical connections and to use their imaginations. It is also free and forces them to be quiet for five minutes so I'm a big fan. 

The story (so far) revolves around this bird, Seth Underwood, who is a lawyer (like my sister- it's funny the things they pick up on) who lives in a tree he has to share with a noisy outcast squirrel named Nick Whirly.  Nick's friend, the vineyard jackrabbit (whose name is disputed at this juncture) has been accused by the garden animals of having stolen the winter food store.  Seth, the bird lawyer, needs to figure out what really happened... although my kids keep forgetting whether or not the jackrabbit really did do it which makes the rest of the story a little convoluted.  But there is an owl and pack of coyotes.


ANYWAY, I thought it would be fun to embroider up some of the animals and hoop frame them in the guest bathroom or something.  Very Etsy chic on unbleached muslin.  The suited bird here was supposed to be the first in a series.  Pretty clear why that plan has been abandon.  The biggest problem is that I can't draw which undermines the whole project.  There is way too much detail and way too much texture.  His pocket watch is overwhelmed by the vest, his beak is wrong, his face is wrong, and his scarf looks too much like the lapel of his jacket.  It all gets lost mixed up together in one piece.  The back is messy and the colors aren't right.  Instead of only outlining I filled in the jacket and the hat and almost immediately regretted it. 


Ugh.  Such a good idea wasted on me!

#4  "The Yellow Envelope Pillow:  MISSING"

I made a cover for one of the couch toss pillows in yellow linen to match the ottomans I slipcovered.  Very simple, no mistakes, I followed the directions in "The Sew Everything Workshop".  I placed it on the sofa and went to bed, came home from work the next day and it was gone.  There are no pictures for the blog or the reward poster.  Vanished. 

Alien abduction?  My husband's subtle way of telling me he hates yellow?  My housekeeper's confused attempt to redecorate for me? Perhaps, the dog stole it.  At any rate, it is lost.  If you see a stray pillow cover please call.  And pillow cover?  Wherever you are, know that I miss you and want you home.  Or I'll have to make another one.

Tuesday, February 8, 2011

Sewing Project: "Twist & Shout" Twirl Skirt for Pre-schoolers


This is Abby's new thing:  refusing to look into the camera, instead posing as if she were contemplating a far off land.


Close up:  It's better if you don't look too close.
 My first piece of clothing!  For this project I followed the directions in One Yard Wonders.  The steps were pretty straight forward, but included a bunch of things I've never done before like make an elastic waistband, use piping, make gathers and hem with bias tape.  I did cheat a little and used store bought piping and binding, but I'm going to assume that is what many people would do, not just beginners like me. 

Notes on the project:
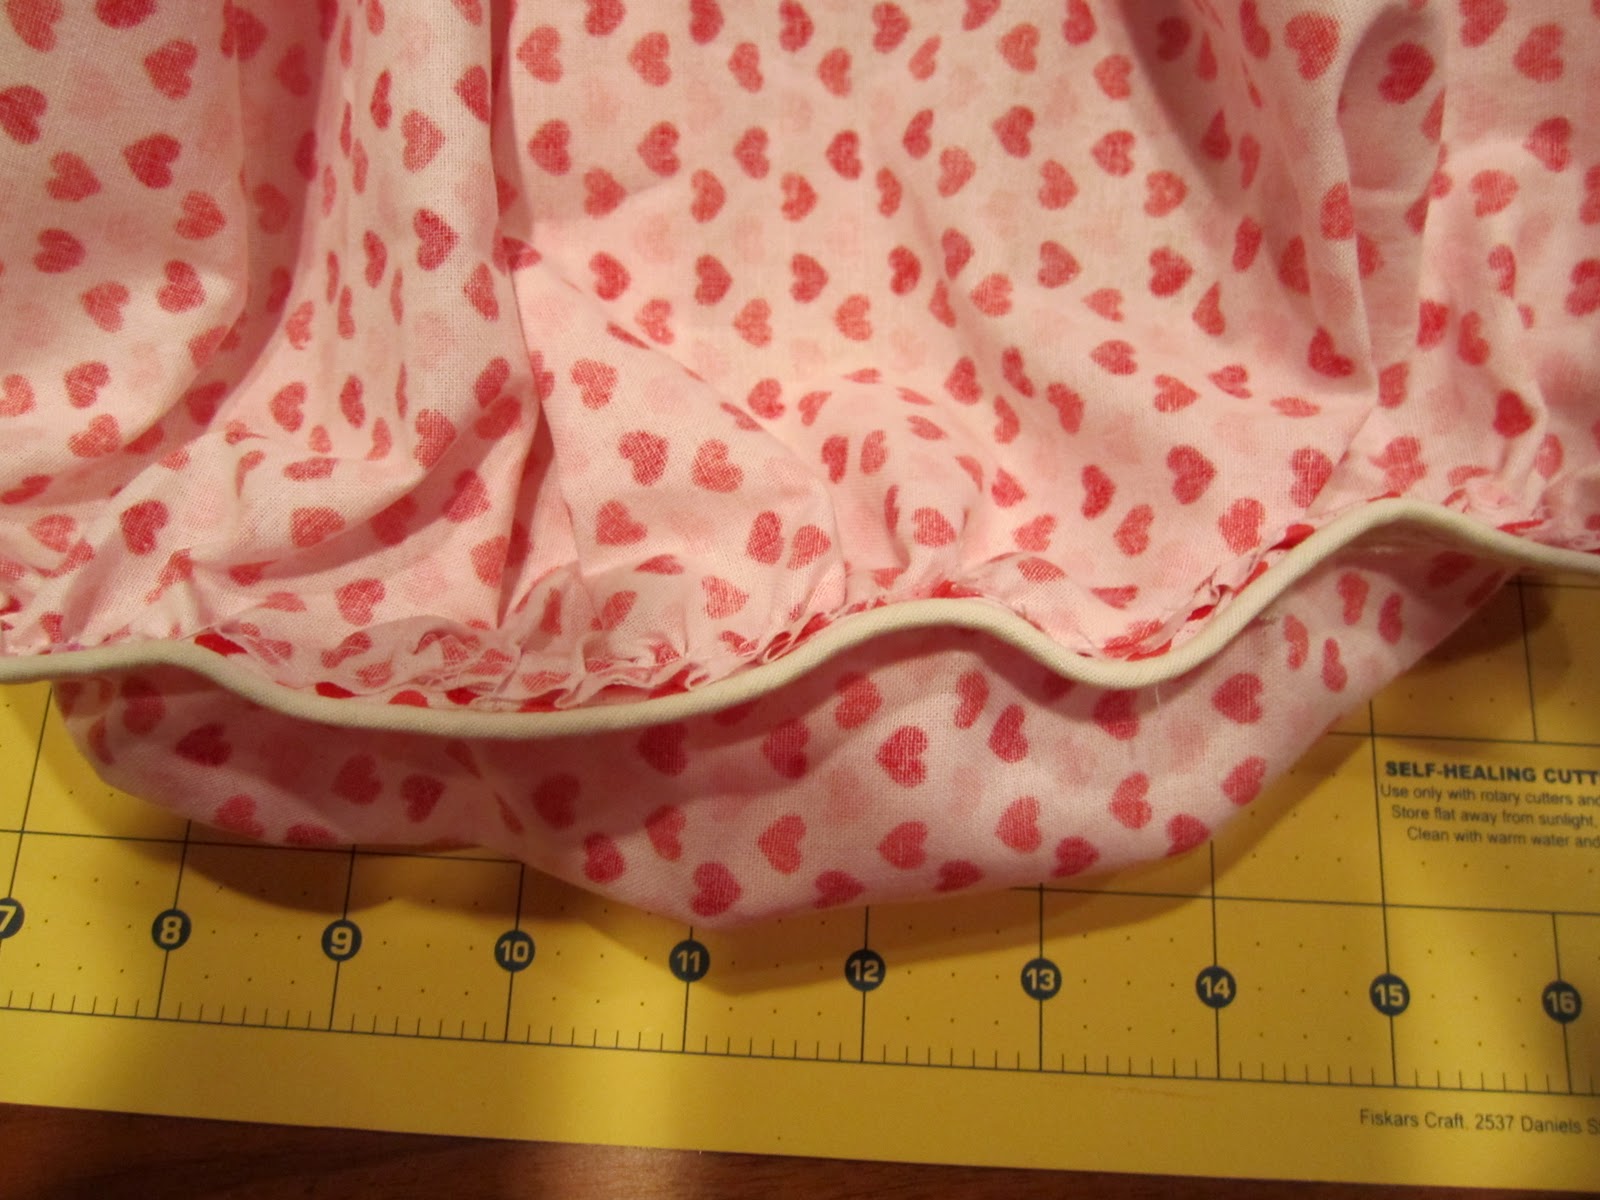
-I initially sewed the piping to the inside of skirt when I combined the yoke and bottom half.  I ripped it out and messed with it until I sorted it out.  I needed to flip up the raw edge of the piping before sewing it.  Piping is still a little wonky, but works.

 Backwards piping.  Ugh.

-I really do need to practice my straight stitches.

-Bias tape is too cool for me.  I love the way it looks, but wow do I have a hard time using it.  I've gone over more then a few tutorials on how to sew with it and am still awkward, at best, around it.  I also should have used red thread to attach it.  I thought the white contrast would look good.  Which it would if I could sew straight.

-I snapped the elastic apart at one point and had to rescue it from inside the casing and reattach it.  Not fun.

-Cost was really low.  I only used 12 inches of 3 yards of elastic that was $3, so, that's like what, 20 cents?  The fabric I had left over from the Valentine's Day chairbacks, about $2 worth.  Plus the piping and the bias tape both of which I have plenty of now for other projects...  I'd say this skirt cost me about $4.  Took me three hours or thereabouts to finish. 

Verdict:  Success!  Well, relative success.  I can see a lot of the mistakes in it, anyone who looks closely could, but I know I'll make it again and do a lot better.  Plus, my daughter loved it.

Upcoming Projects: Not Yet Blogged

a rundown of what I've been up to: DIY wedding dress, "Back to School Night" decor, Flower Arranging for the Incomptent, more jam labels, a dog bed solution, paper embroidery, flying pig needlework, attempting to scrapbook, make your own board game kit, Link from Zelda costume, organinzing for homework, and how to build an afterschooling program!

how to declutter after a death... and how not to do it

what do you do with all your fat clothes? Make doll clothes!