Monday, June 20, 2011

Sewing Project: Lilac & Lime Summer Dress


With the fabric that was intended for Abby's Easter dress I've constructed this summery frock! It is so hot here this is a perfect little outfit. I used the "Toddler's Dress" pattern from Making Children's Clothes by Emma Hardy. It's on the front of the book for good reason! This dress is light, but still a fully lined "real" dress.


She had to prove to me she could dance in it and so wear it to Dance Camp today.
My sewing book shopping spree has abated only a bit, just this one in the last couple of months. Quick review of Making Children's Clothes: directions are pretty straightforward, photos are pretty and inspiring if not always helpful, and diagrams are better then average. I recommend for beginners like me who already have another book that teaches the basics. Cute designs all the way through, very modern, and the shoes (fleetingly) make me want to have another baby.
I skipped the ribbons on the bottom since I thought it would be too much with the thick binding and the ruffles.  How cute are those tiny shoes??
Though not an issue with this dress, nearly none of these books ever show you how the back of a garment is supposed to look which is annoying since that is usually where the closure, (button, zipper, etc.) is placed. It isn't spiral bound but lays open and flat once you break in the binding. My only real complaint is the pattern pieces. The front of the book boasts "25 stylish step-by-step sewing projects for 0-5 years, including full size paper patterns".  Here is a photo of the "full size paper patterns":

It's like a metro map:  take the green line to Piccadilly station, cut on the fold then transfer to the pink line...
Construction wasn't difficult once you got the pattern onto the fabric.  I made a couple of changes- I attached the ruffle to the lining so that it peeks out below the dress. I also attached the green quilt binding at the bottom of the dress vs. hemming and skipped the ribbon detail that is in the instructions.


Strap before the fold and iron...

...strap after. Tip for beginners: this is why a good iron and ironing board are so important. This would be hard to impossible without them. And yes, I need to work on my cutting too.
The yo-yo beribboned badge was fun to make! I got to break out my glue gun which hasn't seen any action in years. Not even sure why I purchased one in the first place.  The lime accent idea came from the fact that I didn't have any white buttons... but I did have green! Then I found the ric-rac and the binding. I really don't plan out these projects in advance like I should.

The back. 
Cost: Technically, I had everything on hand since it was intended for another project, but I'd wager this was about $12. That's probably a little high. I do have a lot of fabric left over. In time this took about 3-4 hours.

Verdict: In love with it! My best project I've completed so far in terms of my skill level in completing it. Could be a little longer, but my daughter has inhumanly long legs (doesn't get it from me!) and while I could adjust it so the shoulder ties were lower, she has a scar on her chest (open heart surgery) that I like to keep covered in the sun.  It wouldn't be hard to adjust the pattern to make it longer next time.

Linkys!:
Running with Glitter


Friday, June 17, 2011

Other Crafts: Library Book Box with Chalkboard Due Date

In blog news, finally customized my header and shifted around my template a bit.  It's awfully pink, isn't it?  But it feels happy and I like it for now.

On to those other crafts I really have no business doing!  I take the kids to the library pretty often which makes me a good mom.  However, I frequently return books late which makes me a bad library patron.  This character flaw persists despite the fact that I spent years working in libraries.  Blog confession:  I had to pay for a book I checked out from UC Berkeley- WHERE I WORKED- because I lost it.  See?  Bad library patron.  And awkward conversation with your boss. 

I want to instill the same love and respect for books and learning in my children that I have, but would prefer if they didn't inherit my poor return habits.  I also hate realizing I need to return the books and then having to tear apart the house in a frenzy (because they are late) trying to find them. I needed a spot to keep them all together and a reminder of when they are due.  So this is my solution:

No more misplaced or overdue library books!

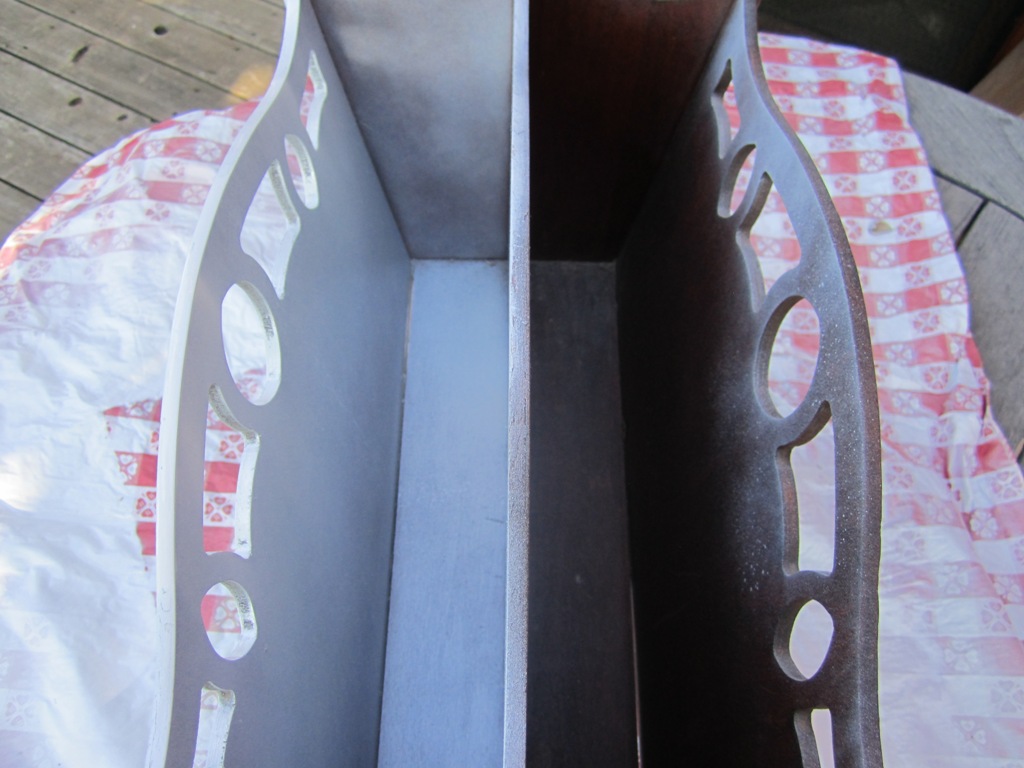
It started life like this:

The wood looks pretty nice in this picture.  It is not.

I bought the magazine rack at an antique shop in town. Thrift shops seem to be littered with them, they must have been a '70s household staple, but like ashtrays that also clutter up second-hand shops, nobody uses them anymore.  As a nation we've apparently quit smoking and canceled our magazine subscriptions.  I was able to talk the owner down to $5 by playing the "hey, I'm a local, possible return shopper and I've got cash" card.  Sometimes it is good to live in a tourist town.  I liked the shape of it, with the little cutouts and it seemed sturdy enough for books.  A lot of the other old magazine racks I'd found had slat sides which I think can look a little messy once things are in them. Unfortunately, when I got it home I saw that the dark wood grain was hiding some flaws.  There was some warping in the wood and some general gaping.  But I figured that was fine since I was going to paint it anyway.

After seeing some of the amazing things people do with spray paint I decided I'd rather try that then break out my waterborne enamel.  Benjamin Moore Impervo is my secret love.  Last year I painted all of the dark redwood trim in my 4,000 sq ft house with it, but enamel is a lot of work.   Spray paint was fast, but it doubled the cost of the project pretty much.  I'm not sure if it was the fault of the less then perfect condition of the wood or my spray paint inexperience, but I got some weird cracking on my second coat (I waited 24 hrs in between so it wasn't wet).  It ended up looking like I'd glazed parts of the finish which is really not me.  I considered sanding it and repainting but I'm lazy, as discussed earlier, and so I just let it be.

The trigger is nice, but it's only 12 oz which isn't much.  I'll try a different brand next time.

  First coat.  At the bottom you can see some of the gapping.

After another day of drying I taped off squares and painted them with chalkboard paint. I've never used chalkboard paint before although I've had this can for months now.  The consistency is a little weird.  It's thick and has the viscosity of watered down pudding.  It's latex based so when I dripped on my work table I was able to wipe it up easily which was nice.  I used a foam brush to keep brush strokes to a minimum.  Even with my careful application, the paint bled in the wood grain, seeping into some, but not all, of the grooves.  Uneven and not cute.  Again, not sure if my taping wasn't up to par or if the wood was just not meant to take it.  My sharp squares weren't too sharp.  I nearly gave up on the project at this point.  It wasn't turning out like I had figured in my head which is why there are no pictures.  I waited another day and then decided to try to salvage it.  I used a smaller brush and just painted bubbly circles over the bleeds.  Again, not me.  I wasn't feeling it at all. 

You can see some of the uneveness in the wood and the crackling in the paint in you look close, bottom right hand corner and middle at the top. 


You have to wait 3 days to condition the chalkboard surface (you just rub it with the side of a piece of chalk to build up dust- doing it I remembered seeing teachers in elementary school do this after their boards were washed once a year).  The result of the conditioning is what saved the whole thing for me!  So, tip for beginners:  chalkboard paint doesn't have half the charm without the chalk.  It made a huge difference in the feel of the piece.  The stark black and white was transformed into a well loved schoolhouse-inspired look that made the effort worthwhile.  It's not perfect, but it is exactly what I needed.  It's imperfection will just keep me from freaking out when it gets knocked over with a soccer ball.


Cost:  Took about 6 days to finish because of drying times.  $5 for the piece, $12.50 for the spray paint.  I already had the foam brush, chalkboard paint (and used very little of it) so I'd say, total was less then $20.  Will probably pay for itself in avoided library fines.

Verdict:  Cute! Useful! Book-a-rific!  I need to work on my spray paint skills and now have to come up with something to do with the rest of that chalkboard paint...

BONUS:  Here's a tip to make your local librarian happy-  pass the books across the desk and don't return them in the drop box if you possibly can.  Emptying those boxes is a pain in the ass, especially if you are already standing behind the circ desk with a bar code scanner in your hand.

Linkys!


Sunday, June 12, 2011

Sewing Project: "Sidekick", Girl Detective's Scottie Dog

Back to the thing that got me into sewing in the first place, stuffed animals! 

Sidekick:  Girl Detective's trusty companion.  Their nigthly walks around the neighborhood often lead to adventure!

Tips for beginners:  when deciding on a pattern make sure to note the finished dimensions carefully.  This dog, while adorable, is TINY.  Maybe 5 inches tall?  My seam allowance is next to nothing because if it weren't I doubt I could have even used my machine.  I may make another version in bigger size.


Sidekick here I made to go with Abby's Girl Detective set of stuff.    The body is a super soft fleece.   I embroidered the eyes, but I think I could have made them a little larger and a bit more round.  He looks a touch angry.  But, perhaps he's just suspicious?  He does have a mystery to solve. 

I used this free pattern.  I chose it because it was the only three-dimensional plush Scottie dog I could find.  And it was free.  And cute.  Can't ask for more then that!  The three dimensional aspect is not easy for me.  I'm not spatially inclined, (as anyone who has been a passenger in my car can attest), and it took me awhile to sort out what I need to do with the pieces. 

Underbelly.  As soon as I figured out I needed to sew these two pieces together the assembly made a lot more sense.


This project probably took me 1.5 hours, but someone not being interrupted every five seconds could easily do this in 45 minutes.  Even at an hour and a half this project was faster then Kitty Bat and Fernando the Bunny who were done without a machine- they each clocked closer to 6 hours.  They can't even stand up!  That said looking more closely at the images from the pattern it sure looks like it was hand-sewn so maybe I wasn't supposed to use my machine at all.

Cost:  $1 in material, maybe?  I bought yard of the fleece so I'll have to find something else to do with the remainder. 

Verdict:  Cute, quick and satisfying to make, just wish he were bigger.

*Flikr group of plush doggies made with this same pattern- some super cute versions in there!  It looks like a lot  of people increased the size too.  And yes, photos confirm that this was supposed to be hand sewn.  Oh well!

Tuesday, June 7, 2011

More Excuses: This time in French!

No posts or sewing projects to share because I was in France for two weeks. It was awesome. I'm feeling a lot more relaxed about everything.  Fourteen days without the grind makes everything feel... lighter.

It was a partial business trip so I spent most of my time wine tasting, but I did my best to sneak in art & history where I could. I really wanted to poke around a fabric shop and buy some French embroidery thread (all I have left from a purchase 15 years ago is peach) but could not find an open shop to save my life.


How awesome does that thread look?

I found this sewing shop in Chinon, but it was closed. Like everything in France. We made lots of jokes that the French must be vampires because Chinon, like many of the French towns we were in, was totally deserted. We'd walk around these cobble stoned streets during the middle of the day and be completely alone, 7 of us like a group of (well dressed) survivors after a zombie attack. Totally bizarre. It wasn't like it happened once or twice either, but everywhere we went. The French need to start having more children or something.

My brother-in-law, Kevin, his girlfriend Serene and my sister-in-law Margaret Ellen.  Note they are totally alone.

Margeaux in Bordeaux: No survivors.

Creepy sign= evidence of human habitation, but again, no humans.

Another deserted town.

Took this photo in the evening in the city center of Borge.  As the sun came down we saw these three.  Clearly they are zombies.

We spent the last couple of days in Paris. Since I've been to Paris bunches of times (and my husband couldn't care less, we might as well have been in Cleveland) I decided I wanted to skip the usual sites and hit up the Musee de la Mode et du Costume (the Paris fashion museum) and the Musee de Arts Decortivs, in particular to see their textile collection. I was thwarted. The Musee Galleira was closed entirely for structural renovation and the textile portion of the Arts Decortivs was off limits while they were installing a new exhibit which I didn't realize until we walked the whole thing. Boo! They did have a special Ralph Lauren exhibit- of his cars. Double boo.

Speaking of textiles... I spent an entire day in Paris unironically dressed as the Statue of Liberty.  If she wore no makeup.

I was able to find bits and pieces of sewing and especially embroidery pretty much all over the place though and have a much better appreciation for the hours of skilled hand-labor that went into many of these things, even the everyday stuff.


Wool pleats in a 16th century nurses dress.  They are perfectly even.

 Sick beds in the Hospices de Beaune.  All I can think of is Harry Potter.  Is that wrong?  Also the hand dyeing and washing these linens had to have received.


Beaded embroidery for Louis XVI.  I can't even imagine how long this must have taken.


Outlined satin stitch.  I could totally do this!

Just not on this scale.  Unbelievable and entirely by hand in the 17th century. The head and foot boards are embroidered all the way up the sides.

Serious velvet draping.  How would you even go about pinning that let alone sewing it?

Upcoming Projects: Not Yet Blogged

a rundown of what I've been up to: DIY wedding dress, "Back to School Night" decor, Flower Arranging for the Incomptent, more jam labels, a dog bed solution, paper embroidery, flying pig needlework, attempting to scrapbook, make your own board game kit, Link from Zelda costume, organinzing for homework, and how to build an afterschooling program!

how to declutter after a death... and how not to do it

what do you do with all your fat clothes? Make doll clothes!