Showing posts with label reviews. Show all posts

Monday, March 12, 2012

Sewing Sofa Slipcovers: Part 1

This project is a huge pain in the ass.  I'm not finished yet, but thought I'd share what is done so far and how I did it in an effort to restore my enthusiasm.  If nothing else, this project has done its job of keeping me occupied and off the Internet. 

Let me begin with a warning:  do not do this.  Or, okay, do it, but only if you really cannot afford a new couch.  I should have just bought new furniture (yes, wasteful, but dear lord! Way easier).  I guess if you are a great seamstress and have endless free time and no kids or no need to sit on the sofa in question for days and days then, sure, you can give it a go.  Otherwise, seriously, Pottery Barn is your friend. 

This is how 40 yards of 54" fabric is shipped to you from Fabric.com:


I'm only 5 feet tall.  This is nearly a third of my body weight. Awkward isn't really strong enough of a word. 

If you follow any sort of "real" directions you will at this point be measuring out everything before cutting.  The math worksheets inside "Custom Slipcovers Made Easy" ought to earn you college credit. At least a unit.  Needless to say I did not do any of that.  Instead, I followed the "Lazy Girl's Guide to Custom Slipcovers" and just did some draping and cutting.
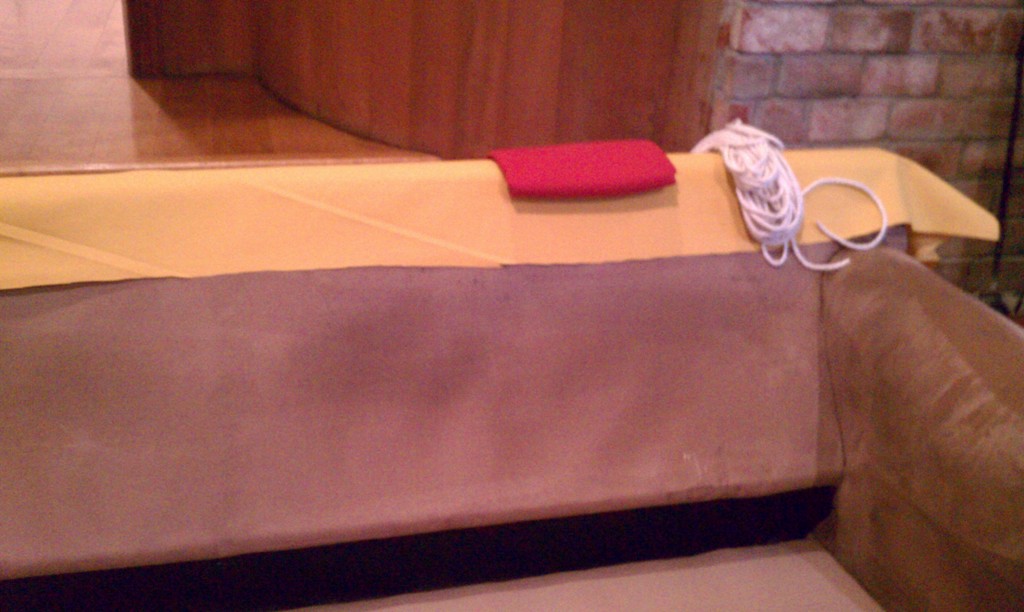
Down the back I have a good 2.5 inches onto the floor.  I regularly have my couch vacuumed and steam cleaned because that's how I am, but I realize that is not typical so remember to vacuum and clean well before you start because you don't want to be doing it in the middle.

Since the fabric is a solid color I just railroaded it which makes things much simpler.  If this is your first slipcover (like me) DO NOT choose a pattern.  Just don't.  It is already enough work.   Remember you want to drape the fabric inside out.  The backside of my fabric is a bit lighter then how it will actually look.

More draping and pinning. In this photo four sections:  outside back, right arm over,  inside back and bench.   Cushions are removed in this photo and I believe were being made into fortresses in front of the TV at this point.

Instead of draping the inside back all the way down onto the bench I put a seam between the bench and the inside back.  My reason for doing this is that my bench could then drape all the way to the floor without a skirt.  Ruffles aren't really my style.  The important note here is that you have to make sure the bench piece is wide enough to wrap around the outside to meet with the side pieces (not in the above photo yet).  You'll have to trim quite a bit around the inside arms, but it will be better then having to piece together yet another bit of fabric. 

All these pins are wrong.  Every single one.

Here is a tip for beginners that ought to be tattooed on my face:  RIGHT SIDES TOGETHER.  I pinned across the back and along the inside arms before realizing I'd pinned it wrong.  Yeah.  That was rough. I was too busy trying to get it straight and tight.  A stupid mistake that cost me a chunk of time.  Another hint:  you will pin your hands.  It will hurt.  Drink wine.  It will help. 

I used something like 300 pins.  My fancy magnetic pin cushion was worth the investment.  I love mine!  I can't imagine what I would have been doing without it.  Individually poking them into my standard tomato?  No thanks. 

"Lazy Girl's Guide" is skimpy on some details which becomes evident once you are trying to fit the fabric around curves and along angles.  I had to make darts along the corners which wasn't difficult or anything- just wasn't in the directions.  This is where the overwhelming detail and complicated techniques in the "Slipcovers Made Easy" book are helpful in pointing you in the right direction.  Not that I was going to be doing faux-box corners or anything, but at least I knew I wasn't crazy that it wasn't looking right without the darts. 


Cutting bias strips is difficult since my cutting table isn't actually wide enough to cut 42" fabric at a full 45 degree angle.  I cut half than flipped the fabric and cut the other half.  It worked.  Don't use disappearing ink as it'll be gone before you get to cutting.  Use tailors' chalk.
After that initial bout of pinning, I needed to pin the arm fronts which I needed welting in order to complete.  I considered making the welting the easy way, just folding fabric straight over cording, but in the end decided that I was going to make it the right way, encased in bias cut strips that were pieced together one at a time.  I did try to figure out how to make continuous loop bias tape to save some effort, but after watching video after video on YouTube I was still confused and so nixed that too.  I did use my rotary cutter for the first time since I failed with it early last year.  They were using rotary cutters in all of the videos so I picked up some tips on how to use them properly, if not how to make the loop.  Kind of in love with it now. 

Another totally awesome tool to use when making your own welting or piping is this do-dad: 

My bias strips are two inches (roughly, even with the rotary cutter some are a little straighter then others) and the cord is cotton piping in size 8/32.  The 4th grade math student in me so wants to reduce that number properly.

The do-dad is magnetic so sticks to the base plate and pushes the cording up along the zipper foot nice and tight.  I have zero idea when or why I purchased it, or what it is really called, I just happened to find it among my notions while searching for my zipper foot and was pretty stoked I had it.  It will also help you gather pins when you leave the magnetic pin cushion in the other room.  FYI. 


I made 7.5 yards of finished welting.  The whole process, cutting bias strips and sewing, took me about 3 hours.  I will need to make an additional 20 yards for the cushions and then double the whole amount for the second couch.  Yeah.  That should be 10-12 hours of work I imagine.


I then pinned the fronts to the arms inserting the welting along the seams.  I cut into the arm drape where I wanted to run the welt horizontally across the side of the couch.  That was unnerving since I'd already pinned the inside of  the arm to the bench and inside back and was concerned I'd mess it up and have to re-do all the work. 


This eats up pins like crazy.

After all the pinning it is finally time to sew.  Now in "Lazy Girl's Guide" she bastes all the seams by hand before taking it to her machine.  That sounded like a good plan to me so I tried it.  Terrible.  I don't know what I did wrong, but something was not right.  I kept snapping the thread and was really burned out with the whole effort.  I quit basting after one one arm.  Maybe I should have taken a break. 

In "Sewing Made Easy" she doesn't baste, but does outline with marker where she wants the seams.  The problem with that is you have to plan ahead of time how you intend to put the fabric through the machine which spatially I cannot do.   Unless she was doing it on both sides of the future seam?  Maybe that would have worked.  Anyway, I said screw it and dragged the pinned mess to my dinning room.


I'm telling you:  buy a new couch.  Ballard Designs, slipcovered "Davenport" $999 for the frame $280-450 for slips.  Sure, no down cushions, but no million pins pricking you either.


This was difficult.  And all kinds of disastrous.  There is simply way too much fabric!  A tip for beginners (that I will be using on the second slipcover):  pin one seam at a time, sew, check the fit, then pin the next seam, sew, check the fit, repeat-repeat-repeat.  It may seem more time efficient to pin all at once and then sew it all at once, which it may very well be, but don't do it if you don't know what you are doing.  

Completely exhausted, I turned it right side out and put it on the couch.  It did not fit well and I had bunching where I'd sewn through two layers on accident in several places.  I did not take a picture because I was pretty sure I was going to give up.  Wish I had now. (Taken photos, not the giving up.) I talked myself into trying to fix it after a couple of days of moping.  I had to rip out and re-pin a bunch of seams, all of them along the arms.  

Cushions back on the couch. We use this room on a daily basis for hanging out and watching TV, playing games, etc. It being off limits for an extended period of time was not possible so we just used while pinned up.

 
You can see how much brighter the yellow and dark coral will make the room.  One day.  Far, far in the future.

Part 2 will be the cushions and I hope to do them this week.  We'll see how it goes with my time.  And then, of course, I have to do the second couch.  Good grief!


Linkys:

NightOwlCrafting


Thursday, March 24, 2011

Sewing How to Books: Quick Review of "One Yard Wonders"

I've bought 10+ sewing how-to books in the past three months. I know, I have a problem.  I've also checked some out of the library, but they get recalled too fast usually for me to make anything.  It takes me awhile to mentally commit to a project.  Usually longer then the project actually takes to complete!


I want to make everything on this cover.

I plan to review all of them, but I'll have to do it in batches or something. First up is One Yard Wonders from which I've already made a few things. The best part of this book is the great array of projects.  There are dozens and dozens!  And not just aprons and tea towels.  For value, number of projects vs. cost, this book is a winner.  Some are pretty uncomplicated (like how to line the back of a bookcase with fabric, which I'm not sure even counts as sewing) while others are fairly complicated, at least for beginners.  There's a good balance of easy, challenging and impossible projects for my (admittedly low) skill level.  Because of the number of projects there aren't as many photos as I'd like, for instance when I made the "All Ages Jumper", there was no photo of the elasticized back which was the tricky part for me. 

The book is spiral bound to lay flat which I appreciate and has a front pocket for the included patterns (I haven't made anything with them yet so I can't comment on their quality).  All the projects include directions on how to lay out the patterns for cutting as to use only 1 yard of fabric.  They point out where the selvage should be which I appreciate since the whole "grain" issue I haven't been able to grasp.  It has made me think before I do other projects about how I want to layout the pieces. 

I wish the projects were coded for difficulty like many of the other books. I also think there could have been a little more quality control in the instructions.  I stumbled online upon a list of corrections for nearly 20 projects in the book, including the "Twist & Shout" toddler skirt I already made my daughter.  Might explain my backwards piping!  The designs are all by various people, not just the authors. I assume there had been some sort of call for projects which might explain why some directions seem super detailed and others a bit more vague.

Next up from this book will be a dog bed (just like on the cover) for the office.  Our very own pug often follows us down to the winery and he isn't fond of the tile floor.  I know he'd just curl up and sleep instead of tripping up employees and chasing forklifts if he had a bed next to my desk. 

That might be wishful thinking.

My Cost: $13.53 (no tax or shipping), now even cheaper on Amazon.
Verdict:  Totally worth it. Great for brave beginners.

Sunday, January 16, 2011

Sewing How To Books: Three short reviews

I'm a reader.  That's just who I am.  The day after Christmas I jumped on Amazon and started going through the sewing how to books to choose a couple.  These are the three I bought, in order of most helpful to a true beginner like me:


Sew Everything Workshop: The Complete Step-by-Step Beginner's Guide
This book is great.  Truly.  The first section, before you get to the projects, is a beginner's goldmine.  There were step by step instructions with color photos of how to wind the bobbin, how to thread the needle, the names of all the parts of the machine, common items you should have on hand, how to pin so it's easy to pull them out as you sew, as well as more advanced stuff I haven't even gotten to yet like how to read a commerical pattern, how to alter store bought clothes, etc.  She names names and by that I mean brand names which as a consumer I appreciate.  If Gutterman is a quality thread brand, tell me!  I need to know so I don't buy something lame that will make my projects harder then they need to be. 

Her advice is practical, like: buy a flat seam ripper because 1) you will need it and 2) if it's round it'll roll off the table.  Her tone is light which makes sewing seem fun and exciting and not a serious and difficult skill you will never master.  She preaches against perfectionism but encourages good preparation and concientious habits by invoking Martha Stewart which I find highly amusing as does she, apparently.   I highly recommed this book even without the projects and patterns that are included.  Bonus!  It is spiral bound so it lies flat if you are following directions word for word.

I took a lot of the advice in this book to heart.  My first shopping trip to the sewing store included a list made from her section on essential tools and so far I've used every single one of them. 


The New Handmade:  Simple Sewing for Contemporary Style
This is also a great book and I think it is a good compliment to the "Sew Everything Workshop".  Her intro to sewing is a lot shorter and doesn't include the same step by step instuctions or instuctional photographs, but her tone is brisk and she too will name names.  The photos of the finished projects in this book are inspiring for someone like me who really isn't into folksy country crap and who isn't looking to make heirloom quilts for the county fair homemakers' pavillion, although she does have a quilt project in there.  Her fabric choices are modern and fun.  She isn't afraid of pattern or color. 

I really like the way the projects are laid out as far as materials needed and the explanation of pre-sewing tasks which I've learned take up the majority of the time: cutting, pinning, measuring, etc. are all much more consuming then actually sitting at the machine.  The best thing about "The New Handmade" is that each project is rated for difficulty so I know as cute as the book cover organizer thing looks I'm not ready to try it quite yet.  That said, I'm the kind of person who likes to jump in and see how things go so my first project wasn't a simple pillow cover or a pot holder but a lined tote bag from this book.


Sew & Stow: 31 Fun Sewing Projects to Carry, Hold, and Organize Your Stuff, Your Home, and Yourself!
I like buckets.  I like storage.  A lot.  If it is cute and promises to make me more efficent I'm probably going to buy it. The Container Store makes me want to lose myself in its plastic, organized utopia forever.  This book played right into that. 

It is not for beginners.  Some of the reviews on Amazon say it is, but no.  At least not if you are like me and don't have someone in the next room you can call for help.  If you are a teenager living at home and your mom has been sewing for 30 years, okay...  this book could work for you.  Nearly none of these projects seem geared toward someone who can barely sew straight like me, let's put it that way.  They look challenging.  There's a lot of materials like cardboard and foam and things that I'd have to search out to find and I imagine might not be cheap. That said the projects do look fun and flipping through it I hope that one day I can make awesome things like... fabric boxes?  I'm not sure what I'll make from this book.  But it is pretty.  The number one drawback is probably not the fault of the author, but the publisher.  All the cool, inspiring color photos of the projects are all stacked together at the beginning of the book which I know is probably due to cost, but who wants to flip back and forth like that?

"Sew & Stow" is going to go to be filed under "aspirational sewing" until later.  Probably much later.

Verdict:  These three books cost me about $46 total.  No shipping or tax because Amazon loves me. The first two were totally worth it and the third, well, I learned what to look for in the future, i.e. projects I can actually make at my current skill level and not just dream about making and a good layout inside.

The Sewing Machine: A Babylock "Maria" Christmas Surprise

During our stuffed animal marathon I commented several times that "Wow, this would be way easier with a sewing machine" and each time my husband shook his head and said, "No way.  You'd never use it."

My sister must have filed that away because she and my mom surprised me with this awesome gift come Christmas morning....

This blog is just a big thank you note to them and an equally big "see-I-am-too-using-it!" to my husband. 

It is a Babylock "Maria" which is a brand I have heard good things about from craftier friends.  Maria a pretty basic model, but not the most basic.  It is mechanical, not electronic and has a standard bobbin instead of a drop-in which I was concerned about at first (once I heard there was a difference) but has proven to be a non-issue.  I love it!  It is uncomplicated but sturdy and all the "engine" parts are metal which is supposedly important for longevity. 

Here's the thing though... I've never used a sewing machine before.  Like, I've literally never touched one in my 34 years.  My mom did a bit of sewing off and on when I was younger but she was constantly fighting with her machine (an ancient off-white Singer) and I stayed far away from that cursed object.  I didn't know what a bobbin even was until a three weeks ago, let alone how to thread one. 

The manual that came with "Maria" kind of sucks.  The images are not instructive and consist of line drawings.  Babylock clearly intends for you to take a class at the their dealers which in my case is 40 minutes away and only on Sundays or something and I'm not that patient.  So instead I hit up YouTube!  God, I love the Internet.


Okay, this video is waaaaay too fast and her hand gets in the way of what she's doing a couple of times but it gave me a sense of what I was supposed to be doing when threading the machine.  So thanks random stranger!  I watched this roughly 30 times.  She has another video of winding the bobbin which was also helpful.  Did you know a sewing machine has thread coming from the top and from the bottom and that's how it stitches stuff together?  Yeah, well, shut up.  I didn't know it.  I guess I never thought about the logistics of machine sewing before.

Sidenote:  If you have a device of some sort and don't know what you're doing I highly recommend YouTube.  This is also how I learned to use my flat iron years ago.  I don't know why more manufacturers don't exploit YouTube as a customer service tool.

Verdict:  I think anything fancier would have been wasted on me.  Embroidery?  Please.  Let's concentrate on straight seams and just learning the jargon.  All in all, so far, I'm very pleased with my little machine.  She's my partner in fabric crime and we will soon rule the craft underworld together!  I am totally changing her name though because "Maria" is not nearly badass enough.

Upcoming Projects: Not Yet Blogged

a rundown of what I've been up to: DIY wedding dress, "Back to School Night" decor, Flower Arranging for the Incomptent, more jam labels, a dog bed solution, paper embroidery, flying pig needlework, attempting to scrapbook, make your own board game kit, Link from Zelda costume, organinzing for homework, and how to build an afterschooling program!

how to declutter after a death... and how not to do it

what do you do with all your fat clothes? Make doll clothes!