Sunday, November 27, 2011

Other Crafts: Thanksgiving Weekend Mayhem

The sewing has taken a backseat this month because I've been busy doing super important things like... arranging plastic foliage and cheering along as people way too old to be photographed doing it played beer pong in a garage.  The pilgrims would be so proud!

Centerpieces, Decorations, Food & Nonsense (no particular order):

Originally, I  planned to use these fake leaves to make a garland, but decided to save myself a few hours and stuck them in vases and wrapped them with ribbon.  Since I had all the stuff I think this cost me $3.

To non-Americans, I assume dressing your child up in paper bags and feathers to celebrate a culture your ancestors decimated must seem pretty odd, but it's done with love and respect. 

I was in charge of the Thanksgiving Feast for Henry's school.  Pumpkin pie for everyone!

The kids' "feast" included me making 50 turkey & swiss sandwiches and buying 3 lbs of dried cranberries.  Also, 250 feet of kraft paper.

While I was turning the parish hall into a Thanksgiving Party Zone, my husband and his siblings were hauling (delicious, delicious!) crab out of the ocean.

Mike & Harry planning their reign of Saturday night beer pong terror.

Their reign did not last long.

Serene & Kim:  breaking the beer pong glass ceiling.

All the world needs is more crayons.

Our real centerpiece.  None of my fake leaves.

MORE PIE!

Thursday, November 17, 2011

Other Crafts: Feathers, Novels, Tap Shoes & More!

I haven't been posting, but I have been keeping myself busy with all sorts of wacky projects that are being done with my usual massive amounts of enthusiasm and limited skill.  I'm having a costume party next week where I will unveil Cleopatra and a surprise costume!

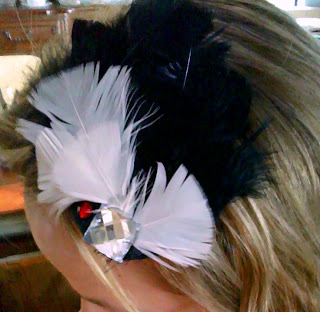
First up is my attempt at a feathered fascinator!  This project was inspired by a dream I had several weeks ago where I was stuck in India, but dressed as a Gibson Girl.  I know, right?!  You have to act on something like that!  So I made this at my dining room table while my sister sat across from me with clear concern for my mental health.  The look on her face as I arranged feathers and tacky rhinestones was totally priceless.  I may or may not have been drinking.

Nothing says "I doubt anyone reads this blog"  like posting a photo taken with your phone while wearing an orange hoodie and no make-up and  making this face.

I couldn't quite get the angles on the feathers to complement each other right.  Next time!

Sparkle!  Feathers!  Tacky! 

Since I do sensitive HR stuff I have to do all my own filing and can't pawn it off on anyone else at work.  Which sucks. I've been threatening my co-workers with a Friday Filing accessory of some sort for several months.  I considered hats, wigs, even wore a crazy enormous necklace once to make my dutiful filing of important documents more palatable so this madness will actually be worn.  I make no apologies!  Filing is boring.  I'll do whatever it takes to entertain myself.

Notes on the project: 
Feathers are messy.  And I don't know how to use them properly.  I read all the directions on how to thin them, how to curl them, how to shape them, etc., but all I ended up doing is making them shorter and then randomly gluing them to felt.  Oh well! 

Cost:  Less then 40 cents of stiff felt, a hair clip I already owned, left over rhinestones from Cleopatra, and probably $2.00 worth of feathers (more then a few of them were sacrificed as I learned how to cut them).  Took me probably 40 minutes of fooling around.

Verdict:  My sister was surprised that it didn't took entirely insane once it was in my hair... which I guess I'll count as a conditional success?  I'm totally going to make more regardless.  Feathers for everyone!


Next Up:  Nanowrimo 2011 is currently barreling through November.  In case you are unfamiliar, this is National Novel Writing Month where you are challenged to write 50,000 words in 30 days.  I'm including it here as writing is one of my preferred crafts and probably the only one that has ever led to actual achievement... though not with Nanowrimo.  I'm a repeat failure at that.  I've participated with varying degrees of dedication for the past eight years.  EIGHT YEARS, people!  And no, I have not finished a novel yet.  Currently, my Nano-novel for 2011 is at 5,000-odd words, so I'm considerably behind on my word count, but I'm not stressed about it. 

I want this so very, very much.  You can order them restored and ready to type!  Not cheap though and I cannot possibly justify purchasing it. 
Boo.  :(
Notes on the project:
Titled "The Diplomat's Peace" the story is a sci-fi adventure (my first time taking a swing at that genre) about a boy named Oliver who discovers he's not entirely human when his mother dies of an alien-specific virus endemic to the galaxy.  Forced to take refuge among those who would undermine human dominance, he is quickly put to use as a spy, but his divided loyalties put him at risk from both sides.  

Cost:  About a gazillion dollars at the coffee shop.

Verdict:  Likely to fail. I'd have to write like 3,000 words a day for the rest of the month including Thanksgiving. 


Then there is tap dancing which is probably more of a talent then a craft, not that I have any, but I always wanted to do it and so I am. Yes, I am 35 and no, I don't care how I might look. 

When I put these away in my closet I realized that I own 5 pairs of black patent leather shoes.  I think I've been trying subconsciously to get myself some tap shoes for years now.

Notes on the project:
I am not very good.  At all.  But it is so much fun!  I begin formal lessons in January.  So far all I've mastered is the Tap-Touch-Shuffle, but it looks like real dancing.  There will be no video uploads for the blog.  Sorry to disappoint!

Cost:  $40 for the shoes, $0 for clothes as I have endless amounts of workout clothes that can double as dancewear with a pair of fishnets, and $80 for the first set of lessons. 

Verdict:  more fun then exercise, I'll have to skip a Monday night spin session to go to the class and I can't decide if that makes it a life fail or a joy win.


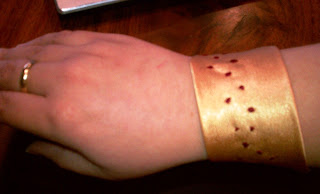
Then I made this bracelet.   My kindergartner got in the car about two weeks ago and told me I was worth lots of rubies.  He'd learned the Biblical proverb at school: "Who can find a worthy woman? For her price is far above rubies."  Really, outrageously sweet.  I then turned on the radio to hear, back to back, Alicia Keys, "A Woman's Worth" followed by Toni Braxton's "He Wasn't Man Enough For Me".  It was '90s R&B awesomeness.  I haven't heard those songs in forever! (Retro Lunchbox on Alice FTW!) Anyway, it stuck with me, the idea of rubies and value and not forgetting that a 5-year old boy (at least) thinks I'm amazing. 
I need to find my real camera, it has been missing now for like three months.  These photos are terrible.

You can't tell in these photos, but this is asymmetrical and far cuter in person. 
Notes on the project: 
crepe-back satin is a surprisingly easy material to embroider, though it does pucker a bit if you pull too hard, but the same can be said for cotton.  It is prettier in person, more depth and shimmer.  I enjoy embroidering and I'm going to do it more often I think.  It really is too bad that I can't draw.  I need someone who can draw for me!

Cost:  Free.  I had everything on hand.

Verdict:  I also need a stamp that says "Validated!".  You know, like they have for parking? I can go around stamping other women's hands with it when I seem them doing something they don't actually need to be doing.  I think the stamp will accessorize nicely with the crazy feathers and tap shoes.

Tuesday, November 1, 2011

Halloween 2011: Homemade Kids' Costumes FINISHED!

 Halloween did not go smoothly this year.  My daughter and I are both sick.  Poor Abby has missed a week of school.  My husband lost me and was nearly convinced I'd been kidnapped (I was waiting for him at the end of our driveway... with a flashlight).  My costume is only 90% done on November 1st.  We only trick or treated about 6 houses in total.  It took us longer to drive into town. All in all, a poor showing considering the amount of forethought put into this holiday. That said, the kids sure looked great!

No jacket version with whip and idol.

Henry's costume was a huge hit at his school.  He had to leave the whip at home since it is technically a weapon, but he brought the legendary artifact, "The Glittering Gargoyle".

I tried to get Henry to make up an adventure to go with this "artifact" but his tale sounded suspiciously like the beginning of Raiders of the Lost Ark. "And then there is traps!  And a big rock!"  He knows better then to mess with a classic, I guess.
This was made with a Dollar Store statue, some gold spray paint and about a thousand rhinestones.  And hot glue!  I burned the hell out of my hand before realizing it was way easier to spread the glue directly on the statue instead of trying to dot glue to the back of each tiny stone.  I'm an idiot. 
Indiana Henry prepares for adventure surrounded by his sidekicks.  His "girlfriend" is the mermaid on the end.  Dr. Jones is a ladies man.

Jacket version.  I have no idea why he is winking. He's a charmer!
The whip started life as a complicated five strand weave.   I was using a two lengths of yarn for each "strand" so that it would be thick enough.   This was a disaster that required a glass of wine before I started over.  I gave up on the 5-strand/pair approach quickly.  I ended up braiding two sets of three and then plaited them with another set of two strands of upbraided yarn to make it.   The handle is duct tape as you can see, (which was super stable and by far the easiest way to make a handle).  The tape was wrapped in black ribbon in an overlapping x-pattern at one point, but that did not last until today.  I'm too lazy to re-do it so you'll have to trust me that it looked fine. 

Pumpkins from the garden behind her... we never carved them.  We're slackers.

Snow White, while very ill, posed like a champ for these photos.  Her collar and cape were made without a pattern because, again, I'm an idiot.   I buy patterns and then just do what I want, apparently.  I've yet to follow an entire real pattern.  I alter the hell out of them despite the fact that I don't know how to sew.  I have no excuse!  Her accessory here is a tweeting blue bird like the ones that follow Snow White around.  Abby also has a plastic poison apple that did not make it into the photos.

Don't forget the sparkle shoes! 

The collar I drew freehand straight onto the satin and used standard interfacing on both pieces to make it stiff.  To get it to fold over properly, i.e. to frame her face but not block her vision, I sewed small pleats into each edge.  I used Velcro to attach it to the inside of the dress-  I sewed the prickly part to the collar and ironed in no-sew Velcro (soft side) into the dress.  If I'd been smarter I could have sewed it to the lining before assembling the bodice, but I didn't think of that. 

The cape, since I didn't follow the pattern, was super easy.  I seamed two rectangles of red stretch velvet together and used a simple hook and eye as a closure.  To keep it from falling over her shoulders and obscuring the laborious puff sleeves I tucked the edge into the back of the dress between the collar and the bodice- the fabric hooked a bit on the Velcro hidden back there and so didn't slip out.  The cape didn't serve to keep her warm since I didn't have it covering her arms, but it was nice enough here in California that it didn't matter.  The velvet draped really well and I'm glad I didn't use more of the cheap satin. 

A grand curtsy.

Notes on the projects:  Indiana Jones was easy, in part because I bought the pants, shirt and jacket... which is kind of the whole costume.  Really I only made the whip, satchel and idol.  But I did hunt down the hat!  Snow White was much harder and required a whole list of things I'd never done before, including (sort-of) using a commerical pattern and all that entails:  a tracing wheel and pattern paper, cutting notches and matching dots, etc.  Plus, the dress itself required me to sew darts, make sleeves and do insets all of which I'd never done before.  I also tried corded gathering for the first time which didn't work out and I was forced to take in the bodice (alterations!)  and use all sorts of materials I'd never worked with (velvet, satin, metallic trims).  If I made Snow White again using this bodice pattern I'd for sure raise the neckline and narrow the shoulder width.  Oddly, there was never any directions for sewing a seam up the back of the bodice which was weird, but I guess it is pretty clear that it needs to be done.  The true work was done by my housekeeper who cleaned up after me.  It's amazing how many bits of thread and scraps of fabric I can create making small children's clothes.

Verdict:  Boo!  Did I scare you?  Halloween rules.  Learned a ton making these costumes.

Cost:  I estimate these costumes cost me between 2,000 pesos and a gazillion euros.  Maybe 600 galactic credits?  I really don't know.  A LOT is the answer. 

Update on Cleopatra as soon as it's finished-finished!  It's crepe-back gold satin and bejeweled!  I know you can't wait.

Monday, October 3, 2011

Halloween 2011: Homemade Indiana Jones Costume Satchel

Much like drunk relatives and Thanksgiving, costume accessories are what make Halloween a real holiday. It's all in the details!
Indiana Jones and The Tweed Suit of Respectability

Indiana Jones is, of course, a Professor of Archeology and Hotness at the fictional Barnett College and therefore needs a sturdy field bag for his journal, passport, and other assorted academic fripperies (magnifying glass, excavation brushes, machete, revolver, etc.). It is also a good place to stash any "rescued" antiquities.

Indiana Jones and The Manly Man Purse

Since I earlier discovered that the real thing is a WWII British gas mask bag,  I had to make one for Henry. I needed it to be easy and cheap too.

Why, yes, he IS wearing a shirt from another Harrison Ford film.  That is a total coincidence, I swear! 
I put the snaps on after Henry tried it out.  I think they could be a little bigger, but it is what I had in my sewing box. Technically, the buckle on the belt and the snaps should be brass, but you get what you get.  It is fully lined in the same fabric which I'm sure my 5 year old really cares about deeply. 

To make the satchel I took the Valentine's Day chairback pattern from the beginning of the year and used it as a base- you can find a detailed tutorial at Our Scoop for the chairback. Obviously, I made some changes to turn it into an adventure-worthy satchel. I skipped the heart cut out, the straps, buttons and ruffles/ric-rac.  To attach it to the belt I inserted squared loops into the seam at the sides between the lining and the exterior, in the same way that you insert the fold over flap. Since the belt is so stiff I made the loops by stitching together two strips of the cotton (both with fused interfacing) and then I back stitched the whole loop to just give it extra strength when I inserted it. Just make sure the loops are centered in the sides, that they are the same size and fit around the belt. 

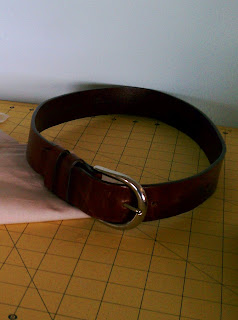
Use your imagination to remove the Calvin Klein embossed logo.  It was a $1.98 at the Salvation Army.  Finding a leather belt small enough to slip across Henry's chest was not easy.  I wasn't going to use leather at all but everything else I looked at just looked... wrong.

All the pieces spread out.  I used a cheap khaki colored cotton, less then $2 worth, but if you are making this spend the money and use canvas.  It will keep it's shape better if nothing else. 

The best thing about this project for me was the fact that it was so plain how much I've improved in my sewing.  This bag took me maybe an hour and a half and I was sipping tea and listening to the kids play in the other room.  It was simple!  Comparing how I struggled with the chairbacks originally it's pretty pleasing.  The notes I made all over the pattern eight months ago seem self-explanatory now. Hooray for me!   Wait, I take it back!  The VERY best thing about this project was how happy Henry was to have it.  "Mommy!  I can put my candy in it!"  Love him so much.

He's probably dreaming about Legos. 

Sunday, September 25, 2011

Halloween 2011: Snow White, Twice.

I've had an exhausting and stressful week.  I turned to Diet Pepsi and my sewing machine for solace.  Okay, and ice cream too.  Shut-up.

Thursday night I finally attached the Snow White skirt to the bodice I finished weeks agoIt did not turn out well.

HA! 
This is the only picture I took of Snow White v.1 for obvious reasons.  Scroll down to preview v.2 if this horrifies your sewing sensabilites. 

Clearly, this is hilarious and in no way is it wearable.  I'm going to be so sad when Abby gets old enough to have taste:  she loved this rendition and kept telling me how beautiful it turned out.  I had to bribe her out of it!  Her love for it was too sweet for words and made me happy to have a daughter.  I tried hard to not giggle as she twirled around blissfully in this awful, ill-conceived costume.  My husband did not even try.  He just laughed, loudly.

So what went wrong?  Many, many things.

- the bodice is way too wide.  While it fits well through the chest her shoulders aren't even close. This was the only part of the dress that I used the pattern for so I'm not sure why it turned out so huge.  The sleeves are half way down her arms!

- around the waist it looks like she's used the dress to shoplift 10 bags of marshmallows.  I did the gathering on the skirt with a cording technique instead of gathering stitches which turned out not to be that much easier and it just added bulk.  Sewing it to the bodice evenly proved impossible, hence the weird pleat on one side and the total lack of a subtle v-front.  It seems to be oddly twisted too.  WTF?  Terrible. 

- you can't tell by looking at it but despite the wide top it was super difficult for her to get in and out of it.  There were some contorted moves with her arms that had to go on, only to look like it was falling off of her when she was wearing it.

I waited for Abby to go to bed and then took the whole thing apart, stitch by stitch.  That took an hour.

And then I stared at the pieces.  And stared at them some more.  Then looked up Snow White dresses on Etsy to make sure I could order a decent homemade one from someone.  There were lots of pretty ones, (I especially loved this country-inspired cotton one, though Abby would be disappointed).  That said, I only found two with a velvet bodice and proper sleeves.  This one is $500 but is really nice.  Still, $500 for a child's costume and the skirt portion was cotton, not satin.  This second one is $329.99 and is stunning but I don't like the sequined ric-rac and the sleeves aren't inset, but red with blue ribbon strips tacked over, plus I intend to make the cape out of red velvet not satin.

I then went to the fabric store and re-purchased all the fabric in case I had to start from scratch. I didn't and now I have an extra 2 yards each of navy stretch velvet and shiny gold satin.  Can you return fabric?

Snow White, v.2 is much improved, though not perfect.

This dress cannot attend your party as it has a prior engagement with my ironing board.  Regrets.


-I cut the cord entirely from the skirt, separating the lining and tulle as well.  It was therapeutic in a way.  Luckily, I'd hemmed it a little long anyway so losing those inches was not a problem.


-Then I took a deep breath and my shears and sliced up the back seam on the bodice.  Scary!  I cut about a quarter inch out of center (lining included) and then folded in about a quarter inch on either side and hemmed the raw edges.  I then stitched a strip of black Velcro into it.  This not only made the bodice fit better it also made getting in and out of it about a million times easier.  It could still be a little tighter and if I'd re-cut the bodice I would have raised the neckline an inch.  It is a touch low for a 4 year old. The Velcro closure is a little bulky, but it will be covered by her cape eventually anyway.

Velcro to the rescue! 
-I ditched the lining and the tulle on the skirt portion.  Instead of doing a gathering stitch I decided to just pin pleats into the skirt portion.  It was a lot easier to control and keep even all the way around and I didn't have to worry about breaking a thread. The v-front could be more pronounced, but I'm okay with how it is now. 

-Now that the sleeves aren't at her elbows you can see how puffy and pretty they turned out. 

I also cut her hair this weekend.  My scissor skillz are immense!  Needless to say she loves it.  I may or may not try a crinoline under it.  We'll see.

Up next is Snow White's cape and the stand-up white collar.  Hopefully, that will go a lot smoother!  Couldn't possibly go worse.

Linkys!:

Wednesday, September 7, 2011

Halloween 2011: Homemade Snow White costume, in progress!

**update to this costume here**

Abby wants to be Snow White for Halloween this year.  In the past she's been a Sweet Pea, a Bee and last year she was Little Red Riding Hood.  She's 4, it's not a long list. 

This is a much bigger project then I anticipated.  I'm using pattern Simplicity 2817, purchased for a whole $1 during Joann's pattern sale last month.  The idea of paying $18 for a pattern now seems ridiculous. It was one of many I bought that day.  I was very pleased with myself.


Both these dresses are pictured with full crinolines which are not mentioned once in the directions or pattern.

I looked through the reviews on PatternReview.com and was convinced that I could complete this costume on my own.  Of course, I've already made a ton of changes so I'm not sure why I bothered looking it up.  Even without my changes, I'm getting the feeling I was wrong in my assessment that this would be easy for the following reasons:

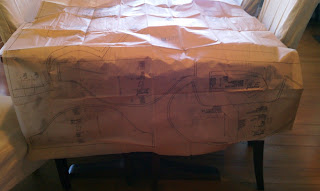
1)  I've never used a commercial pattern before.  All the patterns I've used to date have been from books or the Internet or I've made them myself.  A commercial tissue pattern is a WHOLE other beast.  It's unwieldy and fragile, it has complicated encoded directions, I have to use transfer paper and a pattern wheel.  You have to line up notches and dots... dots I forgot to transfer. There are no step by step pictures, just confusing line drawings.  It's kind of a nightmare.

There are TWO of these evil things and two pages of double sided directions.
 2)  I've never made sleeves before.  You'll note in all my previous clothing projects I've managed to avoid sleeves.  Snow White, however, is not Snow White without her trademark (ridiculously complicated) puff sleeves.  The sleeves I decided to make using the directions from Craftiness is Not Optional instead of the applique directions in the pattern.  I'm not sure if this has made things easier or harder for me since I've never done applique work either, but I like the look of the insets so much better then teardrop shapes being sewn on top. That just seems... lame. The insets are far more "authentic" if such a thing can be said about an animated princess.  I also made the sleeves with the navy velvet instead of the standard light blue satin because I've always thought that was just weird looking.  Sorry, Disney.  Mine are especially puffy per Abby's request.

If you are making this yourself you'll want to make the arm bands longer then the pattern piece actually is, especially if you are doing insets instead of the applique, also I'd make the band a bit wider so that you can hem it.  Since the pattern doesn't call for you to finish the edge at all (!?!#!) I sewed on the cording rather then re-cut, re-fuse and re-sew.  I just skipped the elastic entirely.  On the bodice instead of inserting piping into the front seam I sewed the pretty cording down the front.  Just gives it a bit more detail.  Remember to apply it before you sew the lining to the velvet entirely.
3)  I'm not using cotton, but velvet and satin. And tulle. And cording.  All of which I've never used before.  The costume satin is awful quality too.  Fraying all over the place!  I feel like I have to self seam it before using it.   Plus, it and the velvet are both slippery for lack of a better word and don't stay pinned like I need.  I've had to pull out at least four seams and I'm not even half done with the costume!  The cording has begun fraying too and I have no idea how to fix that. 

The inside is Fray City.  I lined the bodice with bleached muslin that I added interfacing to for structure, but if I were to do it again I'd probably use a navy cotton or face the inside with velvet (assuming I could teach myself that technique).
 I'm not giving up yet, but I'm far from satisfied.  The bodice seems to be a little large even with the darts (another first), but I keep thinking she'll need to wear a turtleneck if it is too cold so I don't want to make it any smaller.  I'll be lining the skirt which it is not called for and putting gold colored tulle between the lining and the skirt (which is more a gold satin then a primary yellow) to give it fullness, otherwise it will just lie flat which is not what Abby will want, but I'm not sure how that will effect the gathering or how it will fit on to the bodice.  Guess we'll find out.

I have a lot more work to do to finish this. Not looking forward to the cape.  See!  This is why I start so early!

Tuesday, August 30, 2011

Other Crafts: "Make Your Own Damn Lunch" Back to School Printables & Garden Tour

Something free today!  My Etsy shop, Starbee Designs, is going on an autumn sabbatical for the upcoming wine grape Harvest.  I looked over my priorities and I just won't have the time for the next couple of months.  My current listings will expire soon and obviously any orders placed before then will be honored, but I'm not going to take on any custom work for the time being which is about 90% of all my orders. 

Cabernet Sauvignon.  Coming to a wine bottle near you... in two to three years. 

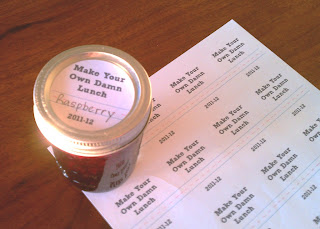
I was going to list a set of jar labels and a fun lunch checklist before school started and never got around to it (see! too busy!) so I thought I'd just share the labels here as a free printable.


2 inch label on an Elite Ball jar.  My sister wanted me to say "jamn" instead of "damn" which I thought was brilliant, but wanted to use these for more then just jam.  I like them filled out with pencil.

You can write in any flavor of jam, hummus, pickles, etc. and practice you penmanship. I was super bummed when I realized that my son's new school is nut-free.  No more PB&J on the days I can't figure out what to make him!  And we have sooo much jam from our garden..  My mother-in- law raided our garden and her own and made more then 300 jars of jam this summer (for my sister-in-law's wedding next year to give as favors), plus the dozens of jars we made for ourselves... and we still have berries!

Here for a PDF sized to fit  2.5 inch round labels (Avery 5294 or OL 350)
or
Here for a PDF sized to fit 1.67 inch round labels (Avery 5293 or OL 325)
or
Here for a PDF sized to fit 2 inch round labels (OL 5375 or print on a full sheet label or copy paper and glue to use with a 2" round punch)

Back to School Garden Tour!  Please note that I LOVE my garden, but am in no way responsible for it's glory or yummy output.  I have a single house plant named Harvey.  No tips or tricks from me.  We (obviously) can't eat all this.  We give a lot of it to friends and co-workers and take everything leftover to the Food Bank.  To keep myself from looking foolish I only took pictures of things I recognized;  there was an embarrassing amount I didn't.  Mostly trees. 

Never ending Raspberries.  Delightful!

The Green Bean Tunnel.  Abby plays here a lot and I can't blame her.  Great fresh and so many ways to pickle them.

Pumpkins!  Told you Halloween was coming up fast.  Expect carvings on the blog.

Artichokes.  I had no idea these were in our garden.  Not really lunchbox-able.

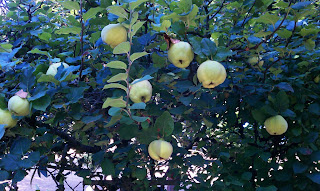
Apples- these are great baking, not so good for school lunch.  Not sweet.  Might be Gravensteins??  I don't know my apples.
*** I've been informed this is a rare quince tree, not an apple at all which would explain why you can't just eat them.***

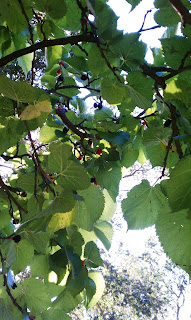
Mulberry TREE, not bush, people.  Make as a chunky jam-chutney and use on meats, like duck.

Some sort of lettuce...  I think.  Embarrassing.
***My mom emailed me to say that this is in fact Swiss Chard and that she has served it to me multiple times in my life.***

Row of cherry tomatoes, I like to take these as snack to the preschool with mini whole wheat bagels and cream cheese.  The kids love it.

Strawberry wine barrels.  Jackrabbits will devour them if you plant them in the ground.

Cutting flowers for arrangements that I constantly forget to go cut and arrange.

A huge pile of garlic, dusted with redwood needles.  Who needs a root cellar when you have trees?   My husband roasts and pickles these.  They kind of freak me out like this.


Linkys!:


Upcoming Projects: Not Yet Blogged

a rundown of what I've been up to: DIY wedding dress, "Back to School Night" decor, Flower Arranging for the Incomptent, more jam labels, a dog bed solution, paper embroidery, flying pig needlework, attempting to scrapbook, make your own board game kit, Link from Zelda costume, organinzing for homework, and how to build an afterschooling program!

how to declutter after a death... and how not to do it

what do you do with all your fat clothes? Make doll clothes!