Sunday, February 27, 2011

Sewing Project: St. Patrick's Day Shamrock Dress

Look!  I made a dress!  A whole dress.  It is wearable and everything!


She agreed to pose only if the tomato pin cushion could pose with her.

She made him a face of pins which is beyond adorable.

Okay, so how did I do it?  A lot of psyching myself up to start.  I must have looked at 100 different patterns and online tutorials to decide what I wanted to make (and to convince myself I could make it).  The basic bodice pattern I took from "Little Girls, Big Style" which I bought last week.  I used the size 4 pattern- my daughter is on the upper end of a size 3- and it turned out a little tight, just an FYI. The lower half of the dress I did without a pattern.  You can't really tell from the photos, but the bottom is a bubble.  I did the gathering with the help of this awesome online tutorial at The Handmade Dress.  It  really was helpful.  I didn't do it perfectly, but now I know how to do it.   


I lined the whole dress with muslin because that was the only neutral fabric I had with that much yardage.  The lining made it a little thick to attach the bottom of the dress to the bodice, but it gave the dress more substance.  It's heavy and fluffy.

Attaching the bodice to the dress-lining sandwich was a little tricky. 
 Notes on the project: 
-the straps (which button in the back) benefited greatly from my previous tote bag making; I'm no longer struggling with the fold and sew.  There should be confetti exploding over my head for that.

-the button and buttonhole-making process was a non-issue this time around.

-I'm struggling still with the cutting.  I think I just need to be more patient.  I also need a cutting table because my back does not appreciate the stooping over.  I had to re-cut the straps and the lining because I did it wrong the first time.

-the bubble bottom isn't the best, but it is fun.  I'll try it again another time, maybe actually follow a pattern!  To make it I attached the raw edge of the dress to the edge of the (shorter) lining which is something I should have done by hand.  It is a little funky as is.  Next time.

-this would be a really cute dress with a nice fancy fabric, maybe a wide silk belt that ties in the back?  I don't know, it could really use some embellishment.  Maybe a yo-yo or two?  Some lace?

-cost was probably $8-9 in materials.  It took me probably about 5 hours.  Maybe a little less. 

Verdict:  Successful!  The first of many dresses, I hope. Abby will wear it to the Irish Hooley mid-March and will hopefully be just as happy as she was today in it.  And she'll be wearing a turtleneck and tights too.  It is freezing here!

Places I've linked up!  (My first such attempt!):


NightOwlCrafting


lil luna link party button

Tuesday, February 22, 2011

Sewing Project: Hand Embroidered Doll Bedding Set

The subtitle for this post is "How I Spent Presidents' Day Weekend".   I made a pillow and blanket set sized for an 18" doll like American Girl or Pottery Barn's soft dolls. This is the largest embroidery project I've finished in decades.  I think the last time I finished something this large I was in sixth grade, easy.  I used about six different stitches, but they were all pretty easy so the stitching isn't that accomplished a feat.  It was more remembering how to do it all that was the challenge.


This is a gift for my goddaughter/niece who turned one a couple of weeks ago.  Yeah, it's late.  And needs to be ironed!  The design I drew myself based on the motifs in Doodle Stitching.  Just pencil on cotton.  Doodle Stitching is a great book, by the way, for people like me who know how to embroider, but aren't so interested in the cross-stitched samplers we did when we were ten.  No teddy bears and alphabets.  I've already bought her second book of motifs to inspire more embroidery! 

Notes on the project:
-while the embroidery is done the sewing actually isn't.  I still have to layer the batting and sew on the back of the blanket this afternoon with my machine.

-this was fun and I could do it while watching tv and talking to others which I can't do with machine sewing.

- cost was zero.  I had everything on hand for this project.  Some of the floss I've actually had for 15 years.  But if I'd had to pay for it, I'd guess this cost no more then $10.  In time this took probably 10 hours.  Maybe longer. 

Verdict:  Success!  My daughter wants one for her dolls too.  Rainbows and hearts were her request!

Sunday, February 13, 2011

Sewing Project: Easy Boy's Toy Roll-Up

My kids both have those crayon roll ups that are all over Etsy.  You know, the fabric ones that have a small pad of paper and a set of crayons?  I buy them for every random kid birthday party I have to attend.  Now that I have my own sewing machine (theoretically) I could make them myself, if I were so inclined or organized.  They are totally adorable and in my experience have saved many fellow air passengers a headache.  The thing is, my son gets bored with the coloring pretty fast.  My daughter could, and does, sit for extraordinary long periods talking to herself and doodling. 

So I came up with this for him:

Hey, that's the old ironing board cover!  I guess I did have a photo.  Ugly, huh?


They slide all the way in and the top folds down on top of them to limit MIA losses. 
These are Star Wars guys in case you aren't aware or don't live with a 5 year old boy.  Toddler action figures are way more dimensional then crayons and they don't fold up as neatly, hence the elastic.  His Hot Wheels will fit in here too in case he wants to mix it up.  The roll up is basically just a replacement for a plastic snack bag that they usually get toted around in on trips. 
 
Notes on the project:
-no pattern or anything, just futzed around with a ruler until I figured it out.

-this took no time at all to sew, however it took me awhile to sort the elastic situation, in the end I just sewed on the fake bow and a button and called it a day.

-the fabric were all scraps and the button was probably the most expensive thing at a whopping 30 cents.

-tips for beginners: if you make something like this I'd recommend knowing what you want to have in it first to measure the pockets (I had the cars).  Don't be afraid to just make stuff.  I wanted to make something the night I made this, but knew I didn't have time to do a whole 'real' project.  This was quick, satisfying and somewhat useful.

Verdict:  Success.  Not super exciting, I almost didn't include it here,  (I did this last week hence the old ironing board).  I almost wish it held a couple more toys then I remind myself  it would be unwieldy and the whole point is to have it travel well.

Wednesday, February 9, 2011

Sewing Project: Extra Wide Ironing Board Cover

I only have an after picture because I started this on a whim and didn't think about it.  You'll have to trust me the old ironing board cover was nothing to photograph anyway.  I bought the board at Walmart several years ago because it boasted that it was "Extra Wide".  What they didn't advertise was that meant standard ironing board covers won't fit so you'll never be able to buy a replacement.  Eight years later, this thing was looking pretty worn.  The biggest problem was that the padding underneath was not sufficient.  When I took off the cover I saw that it was actually just a felt pad.  No wonder the metal crisscross pattern of the base would press itself into the fabric while I ironed!  Now that I'm sewing and using the iron a lot more this board was driving me crazy. I looked up some different directions online and in a couple of books I have to make my own cover, but honestly they all seemed way too complicated:  there were paper bag patterns, bias tape (my current nemesis), and lots of measuring in almost every one.  I just figured this out on my own. 


There was no information printed on the selvage... if you know what this design is called or who makes it, let me know.

Notes on the Project:
-I thought of it as just a big skirt where the waistband goes underneath and the person wearing it is really, really skinny.
-I laid the fabric out over the board, traced it and (without measuring) cut it out eyeballing two inches from the outline.
-I sewed a half inch casement (roughly, I didn't cut very evenly) and put in some 1/4 inch elastic. Since I wasn't sure how much I'd need I didn't cut the elastic until I had it on the board.
-To add some extra padding I traced and cut out some low loft batting to go under the old felt pad.  If you do this yourself I'd recommend measuring out your fabric after cutting out the batting just to make sure you have enough of a side allowance to cover the additional padding. 
-Cost:  I had everything on hand for this project.  The fabric was $8/yard so it wasn't cheap.  I'd guess I used a 1.25 yards, maybe more.  Same with the elastic.  The batting I got on sale a Joann's a couple of weeks ago and I don't remember how much I paid, but I remember it was a great sale.  I'd guess this cost me $12-14.  It took less then two hours. 

Verdict:  Success!  I won't feel so bad leaving out the ironing board in the dining room now.  Not that the ugly cover stopped me before.

Tuesday, February 8, 2011

Sewing Project: "Twist & Shout" Twirl Skirt for Pre-schoolers


This is Abby's new thing:  refusing to look into the camera, instead posing as if she were contemplating a far off land.


Close up:  It's better if you don't look too close.
 My first piece of clothing!  For this project I followed the directions in One Yard Wonders.  The steps were pretty straight forward, but included a bunch of things I've never done before like make an elastic waistband, use piping, make gathers and hem with bias tape.  I did cheat a little and used store bought piping and binding, but I'm going to assume that is what many people would do, not just beginners like me. 

Notes on the project:
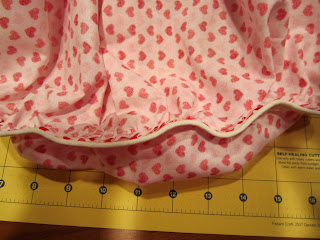
-I initially sewed the piping to the inside of skirt when I combined the yoke and bottom half.  I ripped it out and messed with it until I sorted it out.  I needed to flip up the raw edge of the piping before sewing it.  Piping is still a little wonky, but works.

 Backwards piping.  Ugh.

-I really do need to practice my straight stitches.

-Bias tape is too cool for me.  I love the way it looks, but wow do I have a hard time using it.  I've gone over more then a few tutorials on how to sew with it and am still awkward, at best, around it.  I also should have used red thread to attach it.  I thought the white contrast would look good.  Which it would if I could sew straight.

-I snapped the elastic apart at one point and had to rescue it from inside the casing and reattach it.  Not fun.

-Cost was really low.  I only used 12 inches of 3 yards of elastic that was $3, so, that's like what, 20 cents?  The fabric I had left over from the Valentine's Day chairbacks, about $2 worth.  Plus the piping and the bias tape both of which I have plenty of now for other projects...  I'd say this skirt cost me about $4.  Took me three hours or thereabouts to finish. 

Verdict:  Success!  Well, relative success.  I can see a lot of the mistakes in it, anyone who looks closely could, but I know I'll make it again and do a lot better.  Plus, my daughter loved it.

Thursday, February 3, 2011

Happy Chinese New Year!

Yesterday at my kid's preschool they did a clean up for the new Chinese year (Go Rabbit!) which is a traditional way to prepare for the holiday.   They were super excited about it and ran around the house with dust rags furiously, though not exactly effectively, cleaning.  It was very cute.  So I decided to get in on the action...

Right now this is how I'm storing my sewing supplies:

I've put a moratorium on fabric purchases until I have a better way to store it.
 That's right.  They are corralled in a pack n'play in the guest bedroom.  If we were to have a guest (other then my sister, family doesn't count right?) I don't know what I'd do with it all.  It works for now, but it obviously is not a long term solution.  The sewing machine itself I made room for in my dining room sideboard.  It just barely fits!  Until I have a more permanent spot for sewing I do it on the dining room table anyway. 

Maria in hiding among the china. 

In an effort to make space for myself I forced open the door to our front closet.  Meet "The Green Room":  THE GREEN ROOM... OF DOOM!   


Although our house is large, and I would never complain about the size, it's major (incurable) flaw is the lack of a garage. Parking outside in California weather is not a hassle so the car isn't the problem.  It's all the other stuff!  This front closet must serve multiple purposes.  We store the vacuum here, holiday decorations, tools, old paper work, extension cords, seldom used kitchen appliances, shoes, raincoats, light bulbs, tote bags, etc.  Basically everything you'd store in a garage plus what you'd store in a regular closet... say, like fabric for sewing?  That would be nice.  Oh!  I also stuck a gun cabinet in there because I didn't want one in our bedroom which is where it was when we moved in. We don't have a basement or an attic either so storage space really is at a premium.  In fact, I have to store our emergency earthquake supplies in the shower stall of a downstairs bathroom. 

It's right next to the storage room, hence The Green Room moniker, I swear my whole house is not neon green.  And there are three other bathrooms to shower in so nobody is dirty either!  Stop jumping to conclusions!  I'll organize this one day, too. Maybe next Chinese New Year.

The Year of the Rabbit is off to a good start.  You can now walk INTO The Green Room and easily open and close the door.  I did not discover a spot for my sewing supplies, however.  The room is now more organized, but it is still packed.   Guess our guests will just have to suck it up for awhile until I can come up with someplace else for all my notions.  Where do people store all their sewing stuff??


Upcoming Projects: Not Yet Blogged

a rundown of what I've been up to: DIY wedding dress, "Back to School Night" decor, Flower Arranging for the Incomptent, more jam labels, a dog bed solution, paper embroidery, flying pig needlework, attempting to scrapbook, make your own board game kit, Link from Zelda costume, organinzing for homework, and how to build an afterschooling program!

how to declutter after a death... and how not to do it

what do you do with all your fat clothes? Make doll clothes!